Filter by


System of Measurement
Diameter
DFARS Specialty Metals
Material
Container Type

Distance Measured
Length
Manufacturer Model Number
Export Control Classification Number (ECCN)
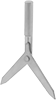
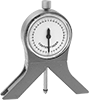
Measuring and Inspecting


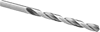
Fabricating and Machining

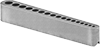
 Abrading & Polishing
 Building & Grounds
 Electrical & Lighting
 Fabricating
 Fastening & Joining
 Filtering
 Flow & Level Control
 Furniture & Storage
 Hand Tools
 Hardware
 Heating & Cooling
 Lubricating
 Material Handling
 Measuring & Inspecting
 Office Supplies & Signs
 Pipe, Tubing, Hose & Fittings
 Plumbing and Janitorial
 Power Transmission
 Pressure & Temperate Control
 Pulling & Lifting
 Raw Materials
 Safety Supplies
 Sawing & Cutting
 Sealing
 Shipping
 Suspending