


Filter by
Electrical Connection
Number of Poles
Wire Connection Method
Sleeve Finish

Shape
RoHS
Performance
Finish
DFARS Specialty Metals
Export Control Classification Number (ECCN)
Pin Material
Cord Holding Type
Build-Your-Own Molex Compact Connectors
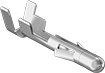
Pins
 |
Voltage, V AC | Current, amp | For Wire Ga. | Wire Connection Method | Pin Dia. | Pkg. Qty. | Pkg. | |||||||||||||||||||||||||||||||||||||||||||||||||||||||||||||||||||||||||||||||||||||||||||||
|---|---|---|---|---|---|---|---|---|---|---|---|---|---|---|---|---|---|---|---|---|---|---|---|---|---|---|---|---|---|---|---|---|---|---|---|---|---|---|---|---|---|---|---|---|---|---|---|---|---|---|---|---|---|---|---|---|---|---|---|---|---|---|---|---|---|---|---|---|---|---|---|---|---|---|---|---|---|---|---|---|---|---|---|---|---|---|---|---|---|---|---|---|---|---|---|---|---|---|---|
Molex Standard 0.093" Connection | |||||||||||||||||||||||||||||||||||||||||||||||||||||||||||||||||||||||||||||||||||||||||||||||||||
| 250 | 14 | 22, 21, 20, 19, 18 | Crimp On | 0.093" | 100 | 69295K23 | 000000 | ||||||||||||||||||||||||||||||||||||||||||||||||||||||||||||||||||||||||||||||||||||||||||||
| 250 | 14 | 20, 19, 18, 17, 16, 15, 14 | Crimp On | 0.093" | 100 | 69295K22 | 00000 | ||||||||||||||||||||||||||||||||||||||||||||||||||||||||||||||||||||||||||||||||||||||||||||
Molex Standard 0.062" Connection | |||||||||||||||||||||||||||||||||||||||||||||||||||||||||||||||||||||||||||||||||||||||||||||||||||
| 250 | 5 | 30, 29, 28, 27, 26, 25, 24 | Crimp On | 0.062" | 100 | 69295K112 | 0000 | ||||||||||||||||||||||||||||||||||||||||||||||||||||||||||||||||||||||||||||||||||||||||||||
| 250 | 5 | 24, 23, 22, 21, 20, 19, 18 | Crimp On | 0.062" | 100 | 69295K111 | 00000 | ||||||||||||||||||||||||||||||||||||||||||||||||||||||||||||||||||||||||||||||||||||||||||||
Molex MLX Connection | |||||||||||||||||||||||||||||||||||||||||||||||||||||||||||||||||||||||||||||||||||||||||||||||||||
| 600 | 13.5 | 20, 19, 18, 17, 16, 15, 14 | Crimp On | 0.084" | 100 | 69295K21 | 0000 | ||||||||||||||||||||||||||||||||||||||||||||||||||||||||||||||||||||||||||||||||||||||||||||
Sleeves
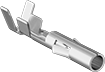 |
Voltage, V AC | Current, amp | For Wire Ga. | Wire Connection Method | For Pin Dia. | Pkg. Qty. | Pkg. | |||||||||||||||||||||||||||||||||||||||||||||||||||||||||||||||||||||||||||||||||||||||||||||
|---|---|---|---|---|---|---|---|---|---|---|---|---|---|---|---|---|---|---|---|---|---|---|---|---|---|---|---|---|---|---|---|---|---|---|---|---|---|---|---|---|---|---|---|---|---|---|---|---|---|---|---|---|---|---|---|---|---|---|---|---|---|---|---|---|---|---|---|---|---|---|---|---|---|---|---|---|---|---|---|---|---|---|---|---|---|---|---|---|---|---|---|---|---|---|---|---|---|---|---|
Molex Standard 0.093" Connection | |||||||||||||||||||||||||||||||||||||||||||||||||||||||||||||||||||||||||||||||||||||||||||||||||||
| 250 | 14 | 22, 21, 20, 19, 18 | Crimp On | 0.093" | 100 | 69295K33 | 000000 | ||||||||||||||||||||||||||||||||||||||||||||||||||||||||||||||||||||||||||||||||||||||||||||
| 250 | 14 | 20, 19, 18, 17, 16, 15, 14 | Crimp On | 0.093" | 100 | 69295K32 | 00000 | ||||||||||||||||||||||||||||||||||||||||||||||||||||||||||||||||||||||||||||||||||||||||||||
Molex Standard 0.062" Connection | |||||||||||||||||||||||||||||||||||||||||||||||||||||||||||||||||||||||||||||||||||||||||||||||||||
| 250 | 5 | 30, 29, 28, 27, 26, 25, 24 | Crimp On | 0.062" | 100 | 69295K116 | 0000 | ||||||||||||||||||||||||||||||||||||||||||||||||||||||||||||||||||||||||||||||||||||||||||||
| 250 | 5 | 24, 23, 22, 21, 20, 19, 18 | Crimp On | 0.062" | 100 | 69295K115 | 00000 | ||||||||||||||||||||||||||||||||||||||||||||||||||||||||||||||||||||||||||||||||||||||||||||
Molex MLX Connection | |||||||||||||||||||||||||||||||||||||||||||||||||||||||||||||||||||||||||||||||||||||||||||||||||||
| 600 | 13.5 | 20, 19, 18, 17, 16, 15, 14 | Crimp On | 0.084" | 100 | 69295K31 | 0000 | ||||||||||||||||||||||||||||||||||||||||||||||||||||||||||||||||||||||||||||||||||||||||||||
Build-Your-Own Molex Circuit Board Connectors

Build-Your-Own Molex Circuit Board Connectors with Locking Tab

