

Build-Your-Own Molex Compact Connectors
Configure a connector for your application—combine housings with pins and sleeves for different wire sizes.
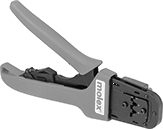
Insertion tools (sold separately) are helpful for assembling small wires.
Extraction tools (sold separately) release the locking mechanism on pins and sleeves to remove them from housings.
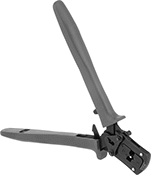
Crimpers (sold separately) are required for wire installation. They ratchet to ensure the correct pressure is applied to every crimp.
![]() For technical drawings and 3-D models, click on a part number.
For technical drawings and 3-D models, click on a part number.
Pins and Sleeves 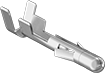 Pin 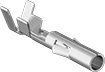 Sleeve Pins
Sleeves
| |||||||||||||||||||||||||||||||||||||||||||||||||||||||||||||||||||||||||||||||||||||||||||||||||||||||||||||||||||||||||||||||||||||||||||||||||
Build-Your-Own Amphenol Circuit Board Connectors
Attach wires to your circuit board with these Amphenol PV connectors. They push together, so they're easy to connect and disconnect yet still give you a strong, secure hold. Even after repeated use, they won’t lose their connection strength. First designed for use in solar power—the PV stands for photovoltaic—they’re also used in equipment ranging from small electronics to industrial robots.
For a complete connection, choose a plug and housing with the number of poles that matches the number of wires you need to connect. You’ll also need one sleeve for each wire.
Plugs have a friction clip to securely hold a housing when mated. An alignment key ensures the plug and housing are mated correctly, which is helpful when you can't get a good look during installation. To install a plug on your circuit board, push their contacts through the board's holes and solder them in place.
Crimpers (sold separately) are required to attach sleeves to your wires.
![]() For technical drawings and 3-D models, click on a part number.
For technical drawings and 3-D models, click on a part number.
Build-Your-Own Molex Circuit Board Connectors with Locking Tab
Connect wires to circuit boards with Molex Mini-Fit push-in connectors. These connectors are easier to detach than Amphenol PV connectors, so they’re often used for prototyping. A complete connector consists of a sleeve housing, sleeves, and a circuit board plug (all sold separately). To assemble these connectors, crimp sleeves onto your wires, then place them inside a sleeve housing. Once you’ve wired the sleeve housing, slide it onto a circuit board plug.
Crimpers are required to install wires.
![]() For technical drawings and 3-D models, click on a part number.
For technical drawings and 3-D models, click on a part number.

Build-Your-Own Molex Circuit Board Connectors
Connect wires to your circuit board with these Molex KK push-in connectors. A good choice for prototyping, they require less force to disassemble than Amphenol PV connectors. However, this means that they are less secure in more demanding applications.
For a complete connection, choose a plug and housing with the number of poles that matches the number of wires you need to connect. You’ll also need one sleeve for each wire.
Crimpers (sold separately) are required to install wires.
![]() For technical drawings and 3-D models, click on a part number.
For technical drawings and 3-D models, click on a part number.