Mitutoyo Plus/Minus Dial Plunger-Style Variance Indicators

For comparative measurements of a part's tolerance against a reference measurement, these indicators have a balanced dial with positive values on one side and negative values on the other side. A spring-loaded plunger retracts and extends to measure objects. All have highly sensitive, wear-resistant jeweled bearings for a long service life. Rotate the dial face for viewing at multiple angles.
Stem-mount indicators have a flat back to fit in tight spaces.
For technical drawings and 3-D models, click on a part number.
Dial | Contact Point | |||||||||||
|---|---|---|---|---|---|---|---|---|---|---|---|---|
| Measuring Range | Measuring Increments | Accuracy | Industry Designation | Mount. Stem Dia. | Dia. | Reading | Head Dia. | Lg. | Mount. Thread Size | Manufacturer Model Number | Each | |
Stem Mount | ||||||||||||
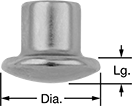
| 0"-0.025" | 0.0001" | ±0.0001" | AGD Group 2 | 3/8" | 2 1/4" | 0-5-0 | 0.118" | 0.366" | 4-48 | 2803AB-10 | 0000000 | 0000000 |
| 0mm-1.000mm | 0.001mm | ±0.005 mm | AGD Group 2 | 5/16" | 2 1/4" | 0-100-0 | 0.118" | 0.595" | M2.5 | 2109AB-10 | 0000000 | 000000 |
Mitutoyo Plus/Minus Dial Plunger-Style
Variance Indicators with Calibration Certificate

These indicators come with a calibration certificate traceable to NIST that states they’ve passed a test for accuracy. They have a balanced dial with positive values on one side of the zero and negative values on the other side for comparative measurements of a part's tolerance against a reference measurement. A spring-loaded plunger retracts and extends to measure objects. All have highly sensitive, wear-resistant jeweled bearings for a long service life. Rotate the dial face for viewing at multiple angles.
Stem-mount indicators have a flat back to fit in tight spaces.
For technical drawings and 3-D models, click on a part number.
Dial | Contact Point | |||||||||||
|---|---|---|---|---|---|---|---|---|---|---|---|---|
| Measuring Range | Measuring Increments | Accuracy | Industry Designation | Mount. Stem Dia. | Dia. | Reading | Head Dia. | Lg. | Mount. Thread Size | Manufacturer Model Number | Each | |
Stem Mount | ||||||||||||
| 0"-0.025" | 0.0001" | ±0.0001" | AGD Group 2 | 3/8" | 2 1/4" | 0-5-0 | 0.118" | 0.366" | 4-48 | 2803AB-10 | 0000000 | 0000000 |
| 0mm-1.000mm | 0.001mm | ±0.005 mm | AGD Group 2 | 5/16" | 2 1/4" | 0-100-0 | 0.118" | 0.595" | M2.5 | 2109AB-10 | 0000000 | 000000 |
Economy Continuous Dial Back Plunger-Style
Variance Indicators with Calibration Certificate


Read the dial face from above—a spring-loaded plunger on the back of these indicators retracts and extends to measure objects. These indicators have a continuous dial numbered clockwise around the face, so it’s easy to see how much a dimension increases. Adjust the tolerance pointers as needed to easily tell which measurements fall outside your limits. They come with a calibration certificate traceable to NIST that states they’ve passed a test for accuracy.
For technical drawings and 3-D models, click on a part number.
Dial | Contact Point | |||||||||||
|---|---|---|---|---|---|---|---|---|---|---|---|---|
| Measuring Range | Measuring Increments | Accuracy | Industry Designation | Mount. Stem Dia. | Dia. | Reading | Head Dia. | Lg. | Mount. Thread Size | Includes | Each | |
| 0"-0.200" | 0.001" | ±0.001" | AGD Group 1 | 1/4" | 1 5/8" | 0-100 | 1/8", 5/16", 1/2" | 0.244", 0.276", 0.335" | 4-48 | One 1/2" Dia. Contact Point (0.276" Lg.) One 1/8" Dia. Contact Point (0.335" Lg.) One 5/16" Dia. Contact Point (0.244" Lg.) | 0000000 | 0000000 |
Starrett Continuous Dial Back Plunger-Style Variance Indicators
The contact point is located on the back of this indicator, which allows the dial face to be read from above. It has a continuous dial numbered clockwise around the face for direct measurements. A rugged design with few moving parts and highly sensitive, wear-resistant jeweled bearings give it a longer service life than other indicators. Rotate the dial face for viewing at multiple angles. The included tip adapter lets you use AGD-standard contact points that have 4-48 threads.
For technical drawings and 3-D models, click on a part number.


Dial | Contact Point | ||||||||||||
|---|---|---|---|---|---|---|---|---|---|---|---|---|---|
| Dial Indicator Type | Measuring Range | Measuring Increments | Accuracy | Mount. Stem Dia. | Dia. | Reading | Head Dia. | Lg. | Mount. Thread Size | Includes | Manufacturer Model Number | Each | |
| Plunger | 0"-0.200" | 0.001" | ±0.001" | 1/4" | 1 3/8" | 0-100 | 1/8", 5/16", 1/2" | 1/4" | 0.127"-60 | One 1/8" Dia. Contact Point One 5/16" Dia. Contact Point One 1/2" Dia. Contact Point Tip Adapter | 196B1 | 0000000 | 0000000 |

| Mount. Hole Dia. | Hole Dia. Range | Manufacturer Model Number | Each | |
| 5/16" | 3/32" to 1/4" | PT18718 | 0000000 | 000000 |

| For Contact Point Thread Size | Manufacturer Model Number | Each | |
| 4-48 | 196R | 0000000 | 00000 |

| For Inside Hole Dp. | Manufacturer Model Number | Each | |
| 1 5/8" | 196F | 0000000 | 000000 |
Upright Post | Bar | ||||||
|---|---|---|---|---|---|---|---|
| Lg. | Dia. | Lg. | Wd. | Ht. | Manufacturer Model Number | Each | |
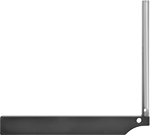
| 4 1/2" | 5/16" | 6" | 3/4" | 3/8" | PT99438 | 0000000 | 000000 |
Upright Post | ||||
|---|---|---|---|---|
| Lg. | Dia. | Manufacturer Model Number | Each | |
| 3" | 5/16" | PT99437 | 0000000 | 000000 |
Upright Post | ||||
|---|---|---|---|---|
| Lg. | Dia. | Manufacturer Model Number | Each | |
| 4 1/2" | 5/16" | PT13820 | 0000000 | 000000 |
Starrett Continuous Dial Back Plunger-Style
Variance Indicators with Calibration Certificate
This indicator comes with a calibration certificate traceable to NIST that states it has passed a test for accuracy. The contact point is located on the back, which allows the dial face to be read from above. It has a continuous dial numbered clockwise around the face for direct measurements. A rugged design with few moving parts and highly sensitive, wear-resistant jeweled bearings give it a longer service life than other indicators. Rotate the dial face for viewing at multiple angles. The included tip adapter lets you use AGD-standard contact points that have 4-48 threads.
For technical drawings and 3-D models, click on a part number.


Dial | Contact Point | ||||||||||||
|---|---|---|---|---|---|---|---|---|---|---|---|---|---|
| Dial Indicator Type | Measuring Range | Measuring Increments | Accuracy | Mount. Stem Dia. | Dia. | Reading | Head Dia. | Lg. | Mount. Thread Size | Includes | Manufacturer Model Number | Each | |
| Plunger | 0"-0.200" | 0.001" | ±0.001" | 1/4" | 1 3/8" | 0-100 | 1/8", 5/16", 1/2" | 1/4" | 0.127"-60 | One 1/8" Dia. Contact Point One 5/16" Dia. Contact Point One 1/2" Dia. Contact Point Tip Adapter | 196B1 | 0000000 | 0000000 |

| Mount. Hole Dia. | Hole Dia. Range | Manufacturer Model Number | Each | |
| 5/16" | 3/32" to 1/4" | PT18718 | 0000000 | 000000 |

| For Contact Point Thread Size | Manufacturer Model Number | Each | |
| 4-48 | 196R | 0000000 | 00000 |

| For Inside Hole Dp. | Manufacturer Model Number | Each | |
| 1 5/8" | 196F | 0000000 | 000000 |

Upright Post | Bar | ||||||
|---|---|---|---|---|---|---|---|
| Lg. | Dia. | Lg. | Wd. | Ht. | Manufacturer Model Number | Each | |
| 4 1/2" | 5/16" | 6" | 3/4" | 3/8" | PT99438 | 0000000 | 000000 |
Upright Post | ||||
|---|---|---|---|---|
| Lg. | Dia. | Manufacturer Model Number | Each | |
| 3" | 5/16" | PT99437 | 0000000 | 000000 |
Upright Post | ||||
|---|---|---|---|---|
| Lg. | Dia. | Manufacturer Model Number | Each | |
| 4 1/2" | 5/16" | PT13820 | 0000000 | 000000 |
Starrett Continuous Dial Back Plunger-Style Variance Indicator Sets
The contact point is located on the back of this indicator, which allows the dial face to be read from above. It has a continuous dial numbered clockwise around the face for direct measurements. A rugged design with few moving parts and highly sensitive, wear-resistant jeweled bearings give it a longer service life than other indicators. Rotate the dial face for viewing at multiple angles.
Tip adapter lets you use AGD-standard contact points that have 4-48 threads with this indicator.
Hole attachment allows the indicator to take measurements inside holes and around obstructions.
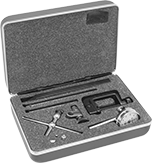
Use the height gauge/tool post attachment to mount the indicator in your lathe tool post or the scriber clamp of your height gauge. Attach the indicator to the upright post with the swivel clamp.
Use the C-clamp with post to clamp the Starrett back plunger-style dial indicator to most thin, flat surfaces. Attach the indicator to the upright post with the swivel clamp.
For technical drawings and 3-D models, click on a part number.


Dial | Contact Point | ||||||||||||
|---|---|---|---|---|---|---|---|---|---|---|---|---|---|
| Dial Indicator Type | Measuring Range | Measuring Increments | Accuracy | Mount. Stem Dia. | Dia. | Reading | Head Dia. | Lg. | Mount. Thread Size | Includes | Manufacturer Model Number | Each | |
| Plunger | 0"-0.200" | 0.001" | ±0.001" | 1/4" | 1 7/16" | 0-100 | 1/8", 5/16", 1/2" | 1/4" | 0.127"-60 | C-Clamp with Post Height Gauge/Tool Post Attachment Hole Attachment One 1/8" Dia. Contact Point One 5/16" Dia. Contact Point One 1/2" Dia. Contact Point Swivel Clamp | 196A1Z | 0000000 | 0000000 |

| Mount. Hole Dia. | Hole Dia. Range | Manufacturer Model Number | Each | |
| 5/16" | 3/32" to 1/4" | PT18718 | 0000000 | 000000 |

| For Contact Point Thread Size | Manufacturer Model Number | Each | |
| 4-48 | 196R | 0000000 | 00000 |

| For Inside Hole Dp. | Manufacturer Model Number | Each | |
| 1 5/8" | 196F | 0000000 | 000000 |

Upright Post | Bar | ||||||
|---|---|---|---|---|---|---|---|
| Lg. | Dia. | Lg. | Wd. | Ht. | Manufacturer Model Number | Each | |
| 4 1/2" | 5/16" | 6" | 3/4" | 3/8" | PT99438 | 0000000 | 000000 |
Upright Post | ||||
|---|---|---|---|---|
| Lg. | Dia. | Manufacturer Model Number | Each | |
| 3" | 5/16" | PT99437 | 0000000 | 000000 |
Upright Post | ||||
|---|---|---|---|---|
| Lg. | Dia. | Manufacturer Model Number | Each | |
| 4 1/2" | 5/16" | PT13820 | 0000000 | 000000 |
| Material | Manufacturer Model Number | For Manufacturer Series | Each | |
| Steel | 196AZZ | 196 | 0000000 | 000000 |
Antimagnetic Starrett Continuous Dial Back
Plunger-Style Variance Indicator Sets
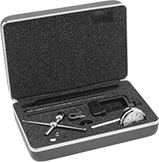
Use the indicator in this set near magnetic chucks and other equipment with a magnetic field. The contact point is located on the back, which allows the dial face to be read from above. It has a continuous dial numbered clockwise around the face for direct measurements. A rugged design with few moving parts and highly sensitive, wear-resistant jeweled bearings give it a longer service life than other indicators. Rotate the dial face for viewing at multiple angles.
Tip adapter lets you use AGD-standard contact points that have 4-48 threads with this indicator.
Hole attachment allows the indicator to take measurements inside holes and around obstructions.
Use the height gauge/tool post attachment to mount the indicator in your lathe tool post or the scriber clamp of your height gauge. Attach the indicator to the upright post with the swivel clamp.
Use the C-clamp with post to clamp the Starrett back plunger-style dial indicator to most thin, flat surfaces. Attach the indicator to the upright post with the swivel clamp.
For technical drawings and 3-D models, click on a part number.


Dial | Contact Point | ||||||||||||
|---|---|---|---|---|---|---|---|---|---|---|---|---|---|
| Dial Indicator Type | Measuring Range | Measuring Increments | Accuracy | Mount. Stem Dia. | Dia. | Reading | Head Dia. | Lg. | Mount. Thread Size | Includes | Manufacturer Model Number | Each | |
| Plunger | 0"-0.200" | 0.001" | ±0.001" | 1/4" | 1 7/16" | 0-100 | 1/8", 5/16", 1/2" | 1/4" | 0.127"-60 | C-Clamp with Post Height Gauge/Tool Post Attachment Hole Attachment One 1/8" Dia. Contact Point One 5/16" Dia. Contact Point One 1/2" Dia. Contact Point Swivel Clamp | 196A6Z | 0000000 | 0000000 |

| Mount. Hole Dia. | Hole Dia. Range | Manufacturer Model Number | Each | |
| 5/16" | 3/32" to 1/4" | PT18718 | 0000000 | 000000 |

| For Contact Point Thread Size | Manufacturer Model Number | Each | |
| 4-48 | 196R | 0000000 | 00000 |

| For Inside Hole Dp. | Manufacturer Model Number | Each | |
| 1 5/8" | 196F | 0000000 | 000000 |

Upright Post | Bar | ||||||
|---|---|---|---|---|---|---|---|
| Lg. | Dia. | Lg. | Wd. | Ht. | Manufacturer Model Number | Each | |
| 4 1/2" | 5/16" | 6" | 3/4" | 3/8" | PT99438 | 0000000 | 000000 |
Upright Post | ||||
|---|---|---|---|---|
| Lg. | Dia. | Manufacturer Model Number | Each | |
| 3" | 5/16" | PT99437 | 0000000 | 000000 |
Upright Post | ||||
|---|---|---|---|---|
| Lg. | Dia. | Manufacturer Model Number | Each | |
| 4 1/2" | 5/16" | PT13820 | 0000000 | 000000 |

| Material | Manufacturer Model Number | For Manufacturer Series | Each | |
| Steel | 196AZZ | 196 | 0000000 | 000000 |
Dial Plunger-Style Variance Indicators with Precision Weighted-Base Holder
Mount
Side View
Mount
Side View
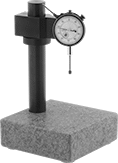
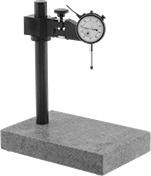
A granite base stabilizes these indicators. The extremely tight flatness tolerances of the granite allow for nearly frictionless workpiece movement and provide an accurate reference plane for inspection work.
Indicators have a continuous dial numbered clockwise around the face for taking direct measurements. Rotate the dial face for viewing at multiple angles. All come with calibration certificates traceable to NIST that state the indicator and the granite base have passed a test for accuracy. They have jeweled bearings that are highly sensitive and wear resistant for a long service life.
Holders with jointed arm have a fine-adjustment knob for precise positioning of the indicator.
Dial | Contact Point | Upright Post | Arm | |||||||||||||||
|---|---|---|---|---|---|---|---|---|---|---|---|---|---|---|---|---|---|---|
| Measuring Range | Measuring Increments | Accuracy | Industry Designation | Indicator Mount. Stem Dia. | Mount. Lug Hole Dia. | Dia. | Reading | Head Dia. | Lg. | Mount. Thread Size | Dia. | Ht. | Lg. | Flexibility | Throat Dp. | Granite Base Flatness Tolerance | Each | |
| 0"-1.000" | 0.001" | ±0.001" | AGD Group 2 | 3/8" | __ | 2 1/4" | 0-100 | 3/16" | 1/4" | 4-48 | 1 1/4" | 8" | 4" | Rigid | 1 3/4" | ±0.00005" | 0000000 | 0000000 |
| 0"-1.000" | 0.001" | ±0.001" | AGD Group 2 | 3/8" | __ | 2 1/4" | 0-100 | 3/16" | 1/4" | 4-48 | 1 1/4" | 12" | 7 5/16" | Jointed | 5" | ±0.0001" | 0000000 | 000000 |
| 0"-1.000" | 0.001" | ±0.001" | AGD Group 2 | 3/8" | 1/4" | 2 1/4" | 0-100 | 3/16" | 1/4" | 4-48 | 1 1/4" | 8" | 4 1/8" | Rigid | 1 3/4" | ±0.00005" | 0000000 | 000000 |
| 0"-1.000" | 0.001" | ±0.001" | AGD Group 2 | 3/8" | 1/4" | 2 1/4" | 0-100 | 3/16" | 1/4" | 4-48 | 1 1/4" | 12" | 7 5/16" | Jointed | 5" | ±0.0001" | 0000000 | 000000 |
Economy Dial Plunger-Style Variance Indicators with Clamp-On Holder


Often used where space is tight or there’s not much of a surface for mounting, the clamp on these indicators fits where a weighted or magnetic base can’t. The clamp also gives you the option to directly mount these indicators to a machine or the piece you’re measuring. With the ball-and-socket segmented arm, you can adjust the indicator to nearly any position to keep it from obstructing what you're measuring. Pull the lever to lock the arm in place when you're done. To measure objects, these indicators have a spring-loaded plunger that retracts and extends as the surface varies. It’s easy to see how much a measurement increases, since the dial is continuous and numbered clockwise around the face. Adjust the tolerance pointers to mark measurements that fall outside your limits.
Indicators with a plier clamp work on most thin, flat surfaces.
Indicators with a C-clamp apply less pressure than indicators with a plier clamp, so there’s less risk of damaging a workpiece.
Dial | Contact Point | Arm | ||||||||||||||
|---|---|---|---|---|---|---|---|---|---|---|---|---|---|---|---|---|
| Measuring Range | Measuring Increments | Accuracy | Industry Designation | Indicator Mount. Stem Dia. | Mount. Lug Hole Dia. | Dia. | Reading | Head Dia. | Lg. | Mount. Thread Size | Clamping Range | Dia. | Lg. | Flexibility | Each | |
Lug and Stem Mount | ||||||||||||||||
Plier Clamp | ||||||||||||||||
| 0.000"-1.000" | 0.001" | ±0.001" | AGD Group 1 | 3/8" | 1/4" | 2" | 0-100 | 0.197" | 0.236" | 4-48 | 0"-1 3/4" | 0.625" | 12" | Flexible | 0000000 | 000000 |
C-Clamp | ||||||||||||||||
| 0.000"-1.000" | 0.001" | ±0.001" | AGD Group 1 | 3/8" | 1/4" | 2" | 0-100 | 0.197" | 0.236" | 4-48 | 0"-6" | 0.625" | 12" | Flexible | 0000000 | 00000 |
Economy Dial Lever-Style Variance Indicators
with Jointed-Arm Magnetic-Base Holder
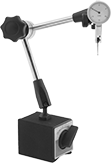
Position the arm by adjusting joints at the top, middle, and bottom. The magnetic base has a V-grooved bottom for mounting on flat and curved metal surfaces and a magnetic release switch for easy setups. Use the fine-adjustment knob on the holder’s clamp for precise positioning of the indicator.
Also known as a test indicator, the indicator has a lever-style contact point that pivots as it comes into contact with a surface and a balanced dial with positive values on one side and negative values on the other side. It has jeweled bearings for high sensitivity, wear resistance, and a long service life. Rotate the dial face for viewing at multiple angles.
Dial | Contact Point | Base | |||||||||||
|---|---|---|---|---|---|---|---|---|---|---|---|---|---|
| Measuring Range | Measuring Increments | Accuracy | Reading | Dia. | Head Dia. | Lg. | Swivel Angle | Lg. | Wd. | Magnetic Pull, lbs. | Includes | Each | |
Horizontal Orientation | |||||||||||||
| 0"-0.03" | 0.0005" | ±0.0004" | 0-15-0 | 1 9/32" | 0.078" | 1/2" | 210° | 1 3/16" | 1 5/32" | 70 | 5/32" Dia. Dovetail-to-Stem Attachment 3/8" Dia. Dovetail-to-Stem Attachment | 0000000 | 000000 |
| 0"-0.03" | 0.0005" | ±0.0004" | 0-15-0 | 1 9/32" | 0.078" | 1/2" | 180° | 2 1/2" | 2" | 132 | 5/32" Dia. Dovetail-to-Stem Attachment 3/8" Dia. Dovetail-to-Stem Attachment | 0000000 | 000000 |
Economy Dial Lever-Style Variance Indicators


Also known as test indicators, these have a lever-style contact point that pivots as it comes into contact with a surface and a balanced dial with positive values on one side and negative values on the other side. They have jeweled bearings for high sensitivity, wear resistance, and a long service life. Rotate the dial face for viewing at multiple angles. Use the included dovetail-to-stem attachments to convert the indicator to a stem mount.
Dial | Contact Point | |||||||||
|---|---|---|---|---|---|---|---|---|---|---|
| Measuring Range | Measuring Increments | Accuracy | Reading | Dia. | Head Dia. | Lg. | Swivel Angle | Includes | Each | |
Horizontal Orientation | ||||||||||
| 0"-0.008" | 0.0001" | ±0.00015" | 0-40-0 | 1 9/32" | 0.078" | 1/2" | 180° | 5/32" Dia. Dovetail-to-Stem Attachment 3/8" Dia. Dovetail-to-Stem Attachment | 0000000 | 000000 |
| 0"-0.03" | 0.0005" | ±0.0004" | 0-15-0 | 1 9/32" | 0.078" | 1/2" | 180° | 5/32" Dia. Dovetail-to-Stem Attachment 3/8" Dia. Dovetail-to-Stem Attachment | 0000000 | 00000 |
Vertical Orientation | ||||||||||
| 0"-0.008" | 0.0001" | ±0.00015" | 0-40-0 | 1 9/32" | 0.078" | 1/2" | 180° | 5/32" Dia. Dovetail-to-Stem Attachment 3/8" Dia. Dovetail-to-Stem Attachment | 0000000 | 00000 |
| 0"-0.03" | 0.0005" | ±0.0004" | 0-15-0 | 1 9/32" | 0.078" | 1/2" | 180° | 5/32" Dia. Dovetail-to-Stem Attachment 3/8" Dia. Dovetail-to-Stem Attachment | 0000000 | 00000 |
Economy Dial Lever-Style Variance Indicators
with Rigid-Arm Magnetic-Base Holder

Place the magnetic base on metal surfaces for a solid mount. It has a V-grooved bottom for mounting on flat and curved surfaces and a magnetic release switch for easy setups. Use the fine-adjustment knob for precise positioning of the holder’s arm.
Also known as a test indicator, the indicator has a lever-style contact point that pivots as it comes into contact with a surface and a balanced dial with positive values on one side and negative values on the other side. It has jeweled bearings for high sensitivity, wear resistance, and a long service life. Rotate the dial face for viewing at multiple angles.
Dial | Contact Point | Base | Upright Post | ||||||||||||
|---|---|---|---|---|---|---|---|---|---|---|---|---|---|---|---|
| Measuring Range | Measuring Increments | Accuracy | Reading | Dia. | Head Dia. | Lg. | Swivel Angle | Lg. | Wd. | Magnetic Pull, lbs. | Dia. | Ht. | Includes | Each | |
Horizontal Orientation | |||||||||||||||
| 0"-0.03" | 0.0005" | ±0.0004" | 0-15-0 | 1 9/32" | 0.078" | 1/2" | 180° | 2 1/2" | 2" | 132 | 7/16" | 6.9" | 5/32" Dia. Dovetail-to-Stem Attachment 3/8" Dia. Dovetail-to-Stem Attachment | 0000000 | 000000 |
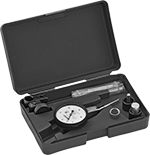
Mitutoyo Dial Lever-Style Variance Indicator Sets
Also known as test indicators, these have a lever-style contact point that pivots as it comes into contact with a surface and a balanced dial with positive values on one side and negative values on the other side. They have highly sensitive, wear-resistant jeweled bearings for a long service life. Rotate the dial face for viewing at multiple angles. Use the included dovetail-to-stem and height gauge/tool post attachments with the swivel clamp to mount the indicator.
Inch/metric indicators are a good choice when you need to convert readings quickly. Those with an inch/metric dial face have imperial measurements on the outer ring and metric on the inner. Those with a metric/inch dial face have metric measurements on the outer ring and imperial on the inner.

Indicator Sets | ||||||||||||
|---|---|---|---|---|---|---|---|---|---|---|---|---|
Dial | Replacement Cases | |||||||||||
| Measuring Range | Measuring Increments | Accuracy | Mount. Stem Dia. | No. of Dovetail Mounts | Reading | Dia. | Includes | Manufacturer Model No. | Each | Each | ||
| 0"-0.008" | 0.0001" | ±0.0001" | 3/8" | 3 | 0-4-0 | 1 9/16" | 0.039", 0.079" and 0.118" Dia. Contact Points, 3/8" Dia. Dovetail-to-Stem Attachment, Height Gauge/Tool Post Attachment, Swivel Clamp | 513-403-10T | 0000000 | 0000000 | 0000000 | 00000 |
| 0"-0.016" | 0.0001" | ±0.0002" | 3/8" | 3 | 0-4-0 | 1 9/16" | 0.039", 0.079" and 0.118" Dia. Contact Points, 3/8" Dia. Dovetail-to-Stem Attachment, Height Gauge/Tool Post Attachment, Swivel Clamp | 513-443-16T | 0000000 | 000000 | 0000000 | 00000 |
| 0"-0.03" | 0.0005" | ±0.0005" | 3/16" | 3 | 0-15-0 | 1 3/16" | 0.039", 0.079" and 0.118" Dia. Contact Points, 3/8" Dia. Dovetail-to-Stem Attachment, Height Gauge/Tool Post Attachment, Swivel Clamp | 513-402-10T | 00000000 | 000000 | 0000000 | 0000 |
| 0"-0.03" | 0.0005" | ±0.0005" | 3/8" | 3 | 0-15-0 | 1 9/16" | 0.039", 0.079" and 0.118" Dia. Contact Points, 3/8" Dia. Dovetail-to-Stem Attachment, Height Gauge/Tool Post Attachment, Swivel Clamp | 513-412-10T | 0000000 | 000000 | 0000000 | 0000 |
| 0"-0.06" | 0.0005" | ±0.0005" | 3/8" | 3 | 0-15-0 | 1 9/16" | 0.039", 0.079" and 0.118" Dia. Contact Points, 3/8" Dia. Dovetail-to-Stem Attachment, Height Gauge/Tool Post Attachment, Swivel Clamp | 513-442-16T | 0000000 | 000000 | 0000000 | 00000 |
| 0"-0.06" | 0.0005" | ±0.0005" | 3/8" | 3 | 0-15-0 | 1 9/16" | 0.039", 0.079" and 0.118" Dia. Contact Points, 3/8" Dia. Dovetail-to-Stem Attachment, Height Gauge/Tool Post Attachment, Swivel Clamp | 513-446-16T | 0000000 | 000000 | 0000000 | 00000 |


Indicator Sets | |||||||||||||
|---|---|---|---|---|---|---|---|---|---|---|---|---|---|
Dial | Replacement Cases | ||||||||||||
| Measuring Range | Measuring Increments | Accuracy | Mount. Stem Dia. | No. of Dovetail Mounts | Reading | Dia. | Includes | Features | Manufacturer Model No. | Each | Each | ||
| 0"-0.008" 0 mm-0.2 mm | 0.0001" 0.002 mm | ±0.0001" ±0.003 mm | 3/16" | 3 | 0-38-0 (Inch) 0-10-0 (Metric) | 1 3/16" | 0.039", 0.079" and 0.118" Dia. Contact Points, 3/8" Dia. Dovetail-to-Stem Attachment, Height Gauge/Tool Post Attachment, Swivel Clamp | Metric/Inch Dial Face | 513-409-10T | 00000000 | 0000000 | 0000000 | 00000 |
| 0"-0.03" 0 mm-0.7 mm | 0.0005" 0.01 mm | ±0.0005" ±0.0015 mm | 3/16" | 3 | 0-15-0 (Inch) 0-35-0 (Metric) | 1 3/16" | 0.039", 0.079" and 0.118" Dia. Contact Points, 3/8" Dia. Dovetail-to-Stem Attachment, Height Gauge/Tool Post Attachment, Swivel Clamp | Inch/Metric Dial Face | 513-406-10T | 00000000 | 000000 | 0000000 | 0000 |


Indicator Sets | ||||||||||||
|---|---|---|---|---|---|---|---|---|---|---|---|---|
Dial | Replacement Cases | |||||||||||
| Measuring Range, mm | Measuring Increments, mm | Accuracy, mm | Mount. Stem Dia. | No. of Dovetail Mounts | Reading | Dia. | Includes | Manufacturer Model No. | Each | Each | ||
| 0-0.2 | 0.002 | ±0.003 | 5/16" | 3 | 0-100-0 | 1 9/16" | 0.039", 0.079" and 0.118" Dia. Contact Points, 3/8" Dia. Dovetail-to-Stem Attachment, Height Gauge/Tool Post Attachment, Swivel Clamp | 513-405-10T | 0000000 | 0000000 | 0000000 | 00000 |
| 0-0.8 | 0.01 | ±0.008 | 5/16" | 3 | 0-40-0 | 1 9/16" | 0.039", 0.079" and 0.118" Dia. Contact Points, 3/8" Dia. Dovetail-to-Stem Attachment, Height Gauge/Tool Post Attachment, Swivel Clamp | 513-404-10T | 0000000 | 000000 | 0000000 | 0000 |
| 0-1.6 | 0.01 | ±0.01 | 3/16" | 3 | 0-40-0 | 1 3/16" | 0.039", 0.079" and 0.118" Dia. Contact Points, 3/8" Dia. Dovetail-to-Stem Attachment, Height Gauge/Tool Post Attachment, Swivel Clamp | 513-444-10T | 00000000 | 000000 | 0000000 | 00000 |
Mounting Thread | |||||||
|---|---|---|---|---|---|---|---|
| Dia. | Lg. | Size | Pitch, mm | Material | Manufacturer Model Number | Each | |
| 0.079" | 0.441" | M1.7 | 0.35 | Carbide | 103010 | 000000 | 000000 |
| 0.079" | 0.453" | M1.7 | 0.35 | Carbide | 136075 | 000000 | 00000 |
| 0.079" | 0.61" | M1.7 | 0.35 | Carbide | 21CZB064 | 000000 | 0000 |
| 0.079" | 0.65" | M1.7 | 0.35 | Carbide | 133195 | 000000 | 00000 |
| 0.079" | 0.685" | M1.7 | 0.35 | Carbide | 103006 | 000000 | 0000 |
| 0.079" | 1.2" | M1.7 | 0.35 | Carbide | 136290 | 000000 | 00000 |
Mitutoyo Dial Lever-Style Variance Indicators
Also known as test indicators, these have a lever-style contact point that pivots as it comes into contact with a surface and a balanced dial with positive values on one side and negative values on the other side. They have highly sensitive, wear-resistant jeweled bearings for a long service life. Rotate the dial face for viewing at multiple angles. Use the included dovetail-to-stem attachment to convert the indicator to a stem mount.
Inch/metric indicators have both measurements on the dial face for quick conversions.

Indicators | |||||||||||||||
|---|---|---|---|---|---|---|---|---|---|---|---|---|---|---|---|
Dial | Contact Point | Replacement Cases | |||||||||||||
| Measuring Range | Measuring Increments | Accuracy | Mount. Stem Dia. | No. of Dovetail Mounts | Reading | Dia. | Head Dia. | Lg. | Mount. Thread Size | Swivel Angle | Mfr. Model No. | Each | Each | ||
| 0"-0.008" | 0.0001" | ±0.0001" | 3/8" | 3 | 0-4-0 | 1 9/16" | 0.079" | 0.61" | M1.7 | 190° | 513-403-10E | 000000 | 0000000 | 0000000 | 00000 |
| 0"-0.016" | 0.0001" | ±0.0002" | 5/32", 3/8" | 3 | 0-4-0 | 1 9/16" | 0.079" | 0.61" | M1.7 | 190° | 513-443-16A | 000000 | 000000 | 0000000 | 00000 |
| 0"-0.03" | 0.0005" | ±0.0005" | 3/8" | 3 | 0-15-0 | 1 9/16" | 0.079" | 0.65" | M1.7 | 190° | 513-402-10E | 0000000 | 000000 | 0000000 | 0000 |
| 0"-0.03" | 0.0005" | ±0.0005" | 3/8" | 3 | 0-15-0 | 1 9/16" | 0.079" | 1.2" | M1.7 | 190° | 513-412-10E | 000000 | 000000 | 0000000 | 0000 |
| 0"-0.06" | 0.0005" | ±0.0005" | 5/32", 3/8" | 3 | 0-15-0 | 1 9/16" | 0.079" | 0.65" | M1.7 | 190° | 513-442-16A | 000000 | 000000 | 0000000 | 00000 |
| 0"-0.06" | 0.0005" | ±0.0005" | 5/32", 3/8" | 3 | 0-15-0 | 1 9/16" | 0.079" | 1.2" | M1.7 | 190° | 513-446-16A | 000000 | 000000 | 0000000 | 00000 |

Indicators | ||||||||||||||||
|---|---|---|---|---|---|---|---|---|---|---|---|---|---|---|---|---|
Dial | Contact Point | Replacement Cases | ||||||||||||||
| Measuring Range | Measuring Increments | Accuracy | Mount. Stem Dia. | No. of Dovetail Mounts | Reading | Dia. | Head Dia. | Lg. | Mount. Thread Size | Swivel Angle | Features | Mfr. Model No. | Each | Each | ||
| 0"-0.0075" 0mm-0.2mm | 0.0001" 0.002mm | ±0.00015" ±0.003 mm | 5/16" | 3 | 0-38-0 (Inch) 0-10-0 (Metric) | 1 9/16" | 0.079" | 0.6" | M1.7 | 190° | Metric/Inch Dial Face | 513-409-10E | 0000000 | 0000000 | 0000000 | 00000 |
| 0"-0.03" 0mm-0.7mm | 0.0005" 0.01mm | ±0.0005" ±0.015 mm | 5/16" | 3 | 0-15-0 (Inch) 0-35-0 (Metric) | 1 9/16" | 0.079" | 0.65" | M1.7 | 190° | Inch/Metric Dial Face | 513-406-10E | 0000000 | 000000 | 0000000 | 0000 |

Indicators | |||||||||||||||
|---|---|---|---|---|---|---|---|---|---|---|---|---|---|---|---|
Dial | Contact Point | Replacement Cases | |||||||||||||
| Measuring Range, mm | Measuring Increments, mm | Accuracy, mm | Mount. Stem Dia. | No. of Dovetail Mounts | Reading | Dia. | Head Dia. | Lg. | Mount. Thread Size | Swivel Angle | Mfr. Model No. | Each | Each | ||
| 0-0.14 | 0.001 | ±0.004 | 5/16" | 3 | 0-70-0 | 1 9/16" | 0.079" | 0.44" | M1.7 | 190° | 513-401-10E | 0000000 | 0000000 | 0000000 | 00000 |
| 0-0.2 | 0.01 | ±0.003 | 5/16" | 3 | 0-100-0 | 1 9/16" | 0.079" | 0.6" | M1.7 | 190° | 513-405-10E | 000000 | 000000 | 0000000 | 0000 |
| 0-0.5 | 0.01 | ±0.005 | 5/16" | 3 | 0-25-0 | 1 9/16" | 0.079" | 0.74" | M1.7 | 190° | 513-424-10E | 0000000 | 000000 | 0000000 | 0000 |
| 0-0.8 | 0.01 | ±0.008 | 5/16" | 3 | 0-40-0 | 1 9/16" | 0.079" | 0.69" | M1.7 | 190° | 513-404-10E | 000000 | 000000 | 0000000 | 0000 |
Mounting Thread | |||||||
|---|---|---|---|---|---|---|---|
| Dia. | Lg. | Size | Pitch, mm | Material | Manufacturer Model Number | Each | |
| 0.079" | 0.441" | M1.7 | 0.35 | Carbide | 103010 | 000000 | 000000 |
| 0.079" | 0.453" | M1.7 | 0.35 | Carbide | 136075 | 000000 | 00000 |
| 0.079" | 0.61" | M1.7 | 0.35 | Carbide | 21CZB064 | 000000 | 0000 |
| 0.079" | 0.65" | M1.7 | 0.35 | Carbide | 133195 | 000000 | 00000 |
| 0.079" | 0.685" | M1.7 | 0.35 | Carbide | 103006 | 000000 | 0000 |
| 0.079" | 1.2" | M1.7 | 0.35 | Carbide | 136290 | 000000 | 00000 |
Interapid Dial Lever-Style Variance Indicators
Measure larger ranges than with our other lever-style indicators. Also known as test indicators, these have a lever-style contact point that pivots as it comes into contact with a surface and a balanced dial with positive values on one side and negative values on the other side. Rotate the dial face for viewing at multiple angles. Bearings are jeweled for high sensitivity, wear resistance, and a long service life. A revolution counter helps you keep track of dial revolutions.
Mounting stem adapters (sold separately) increase the diameter of your indicator mounting stem from 5/32" to 3/8" so it can be mounted to holders that fit 3/8" diameter stems.
For technical drawings and 3-D models, click on a part number.


Dial | Contact Point | ||||||||||||
|---|---|---|---|---|---|---|---|---|---|---|---|---|---|
| Measuring Range | Measuring Increments | Accuracy | Mounting Stem Dia. | Number of Dovetail Mounts | Reading | Dia. | Head Dia. | Lg. | Mounting Thread Size | Swivel Angle | Manufacturer Model Number | Each | |
Horizontal Orientation | |||||||||||||
| 0"-0.016" | 0.0001" | ±0.0001" | 5/32" | 2 | 0-4-0 | 1 1/2" | 0.08" | 0.65" | M1.7 | 210° | 312b-3 | 00000000 | 0000000 |
| 0"-0.06" | 0.001" | ±0.001" | 5/32" | 2 | 0-15-0 | 1 1/4" | 0.08" | 0.65" | M1.7 | 210° | 312b-20 | 00000000 | 000000 |
| 0"-0.06" | 0.0005" | ±0.0005" | 5/32" | 2 | 0-15-0 | 1 1/4" | 0.08" | 0.65" | M1.7 | 210° | 312b-2 | 00000000 | 000000 |
| 0"-0.06" | 0.0005" | ±0.0005" | 5/32" | 2 | 0-15-0 | 1 1/2" | 0.08" | 0.65" | M1.7 | 210° | 312b-1 | 00000000 | 000000 |
| 0mm-1.6mm | 0.01mm | ±0.01mm | 5/32" | 2 | 0-40-0 | 1 15/32" | 0.08" | 0.65" | M1.7 | 210° | 312-1 | 00000000 | 000000 |
Vertical Orientation | |||||||||||||
| 0"-0.016" | 0.0001" | ±0.0001" | 5/32" | 1 | 0-4-0 | 1 1/2" | 0.08" | 0.65" | M1.7 | 190° | 312b-3v | 00000000 | 000000 |
| 0"-0.06" | 0.001" | ±0.001" | 5/32" | 1 | 0-15-0 | 1 1/4" | 0.08" | 0.65" | M1.7 | 190° | 312b-20v | 00000000 | 000000 |
| 0"-0.06" | 0.0005" | ±0.0005" | 5/32" | 1 | 0-15-0 | 1 1/4" | 0.08" | 0.65" | M1.7 | 190° | 312b-2v | 00000000 | 000000 |
| 0"-0.06" | 0.0005" | ±0.0005" | 5/32" | 1 | 0-15-0 | 1 1/2" | 0.08" | 0.65" | M1.7 | 190° | 312b-1v | 00000000 | 000000 |
Mounting Thread | |||||||
|---|---|---|---|---|---|---|---|
| Dia. | Lg. | Size | Pitch, mm | Material | Manufacturer Model Number | Each | |
| 0.031" | 0.703" | M1.7 | 0.35 | Carbide | 74.105998 | 00000000 | 000000 |
| 0.031" | 0.842" | M1.7 | 0.35 | Carbide | 74.111488 | 00000000 | 00000 |
| 0.031" | 1.465" | M1.7 | 0.35 | Carbide | 74.106363 | 00000000 | 00000 |
| 0.031" | 1.765" | M1.7 | 0.35 | Carbide | 74.111493 | 00000000 | 00000 |
| 0.06" | 0.718" | M1.7 | 0.35 | Carbide | 74.105997 | 00000000 | 00000 |
| 0.06" | 0.857" | M1.7 | 0.35 | Carbide | 74.111487 | 00000000 | 00000 |
| 0.08" | 0.728" | M1.7 | 0.35 | Carbide | 74.105996 | 00000000 | 00000 |
| 0.08" | 0.867" | M1.7 | 0.35 | Carbide | 74.111486 | 00000000 | 00000 |
| 0.08" | 1.409" | M1.7 | 0.35 | Carbide | 74.106361 | 00000000 | 00000 |
| 0.08" | 1.79" | M1.7 | 0.35 | Carbide | 74.111492 | 00000000 | 00000 |
| 0.093" | 0.735" | M1.7 | 0.35 | Carbide | 74.116285 | 00000000 | 00000 |

| For Mounting Stem Dia. | Material | Each | |
| 5/32" × 3/8" | Steel | 00000000 | 000000 |
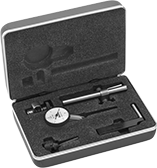
Starrett Dial Lever-Style Variance Indicator Sets
Also known as test indicators, these have a lever-style contact point that pivots as it comes into contact with a surface and a balanced dial with positive values on one side and negative values on the other side. They have highly sensitive, wear-resistant jeweled bearings for a long service life. Rotate the dial face for viewing at multiple angles. Use the included attachments with the swivel clamp to mount the indicator in the setup of your choice.
For technical drawings and 3-D models, click on a part number.

Indicator Sets | ||||||||||||
|---|---|---|---|---|---|---|---|---|---|---|---|---|
Dial | Replacement Cases | |||||||||||
| Measuring Range | Measuring Increments | Accuracy | Number of Dovetail Mounts | Reading | Dia. | Includes | Manufacturer Model Number | Choose a Dial Face Color | Each | Each | ||
| 0"-0.01" | 0.0001" | ±0.0001" | 3 | 0-5-0 | 1 3/8" | 3/8" Dia. Dovetail-to-Stem Attachment, Height Gauge/Tool Post Attachment, Swivel Clamp with Dovetail Mount, Swivel-Clamp Rod Unit with One 1/4" Dia. × 4" Lg. Rod and One 3/8" Dia. × 4" Lg. Rod | 708ACZ | 00000000 | 0000000 | 0000000 | 000000 | |
| 0"-0.02" | 0.0001" | ±0.0002" | 3 | 0-5-0 | 1 3/8" | 3/8" Dia. Dovetail-to-Stem Attachment, Height Gauge/Tool Post Attachment, Swivel Clamp with Dovetail Mount, Swivel-Clamp Rod Unit with One 1/4" Dia. × 4" Lg. Rod and One 3/8" Dia. × 4" Lg. Rod | 708BCZ | White | 00000000 | 000000 | 0000000 | 00000 |
| 0"-0.03" | 0.0005" | ±0.0005" | 3 | 0-15-0 | 1 3/8" | 3/8" Dia. Dovetail-to-Stem Attachment, Height Gauge/Tool Post Attachment, Swivel Clamp with Dovetail Mount, Swivel-Clamp Rod Unit with One 1/4" Dia. × 4" Lg. Rod and One 3/8" Dia. × 4" Lg. Rod | 709ACZ | 00000000 | 000000 | 0000000 | 00000 | |
| 0"-0.06" | 0.0005" | ±0.001" | 3 | 0-15-0 | 1 3/8" | 3/8" Dia. Dovetail-to-Stem Attachment, Height Gauge/Tool Post Attachment, Swivel Clamp with Dovetail Mount, Swivel-Clamp Rod Unit with One 1/4" Dia. × 4" Lg. Rod and One 3/8" Dia. × 4" Lg. Rod | 709BCZ | White | 00000000 | 000000 | 0000000 | 00000 |
| Dia. | Lg. | Mounting Thread Size | Material | Manufacturer Model Number | Each | |
| 0.078" | 0.897" | 1-64 | Carbide | PT23914 | 00000000 | 000000 |
Compact Dial Lever-Style Variance Indicators
A slim design lets you measure in tight spots. Also known as test indicators, these variance indicators have a lever-style contact point that pivots as it touches a surface. They also have a balanced dial with positive values on one side and negative values on the other. This makes them great for measuring if a part is above or below a certain tolerance. All have jeweled bearings for high sensitivity, wear resistance, and a long service life.
For technical drawings and 3-D models, click on a part number.


