Filter by
Unit of Measure
Component
Maximum Torque
Torque
Torque-Measuring Direction
DFARS Specialty Metals
Operating Mode
Export Control Classification Number (ECCN)
Data Connection
Electrical Connection
Graduations
Shape
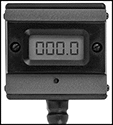
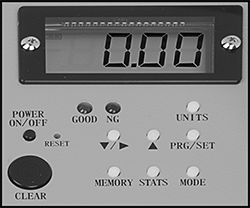
Data-Recording Torque Gauges
Gauges
Features | Lg. | Ht. | Wd. | Data Log Cap. | Batteries Included | Includes | Container Type | Each | |||
|---|---|---|---|---|---|---|---|---|---|---|---|
in·ozf, in·lbf, ft·lbf, kgf-cm, kgf-m, N-cm, N-m | |||||||||||
| Torque Measurement Memory, Programmable Torque Settings, Maximum Torque Display, Keypad, Headphone Jack, Audible Alarm | 6" | 2 1/2" | 3" | 3,500 | Yes | 3-ft Long USB Cable | Plastic Case | 5833A11 | 000000000 | ||
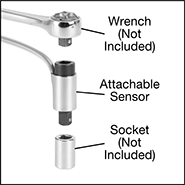
Wrench-Attachable Sensors with Calibration Certificate Traceable to NIST
Accuracy | |||||||||
|---|---|---|---|---|---|---|---|---|---|
Square Drive Size (Gender) | Torque Range | Torque-Measuring Direction | Clockwise | Counterclockwise | Cord Lg., ft. | Each | |||
in·ozf, in·lbf, ft·lbf, N-m, N-cm, kgf-m, kgf-cm, | |||||||||
| 1/4" (Female) × 1/4" (Male) | 80 to 800 in·ozf 5 to 50 in·lbf 0.417 to 4.17 ft·lbf 0.565 to 5.65 N-m 56.5 to 565 N-cm 0.058 to 0.576 kgf-m 5.76 to 57.6 kgf-cm | Clockwise and Counterclockwise | ±1% | ±1% | 4 | 5833A21 | 0000000 | ||
| 1/4" (Female) × 1/4" (Male) | 320 to 3,200 in·ozf 20 to 200 in·lbf 1.67 to 16.7 ft·lbf 2.26 to 22.6 N-m 226 to 2,260 N-cm 0.23 to 2.3 kgf-m 23 to 230 kgf-cm | Clockwise and Counterclockwise | ±1% | ±1% | 4 | 5833A22 | 000000 | ||
| 3/8" (Female) × 3/8" (Male) | 120 to 1,200 in·lbf 10 to 100 ft·lbf 13.6 to 136 N-m 1,356 to 13,560 N-cm 1.38 to 13.8 kgf-m 138 to 1,383 kgf-cm | Clockwise and Counterclockwise | ±1% | ±1% | 4 | 5833A23 | 000000 | ||
| 1/2" (Female) × 1/2" (Male) | 300 to 3,000 in·lbf 25 to 250 ft·lbf 33.9 to 339 N-m 3,390 to 33,900 N-cm 3.46 to 34.6 kgf-m 346 to 3,456 kgf-cm | Clockwise and Counterclockwise | ±1% | ±1% | 4 | 5833A24 | 000000 | ||
| 3/4" (Female) × 3/4" (Male) | 720 to 7,200 in·lbf 60 to 600 ft·lbf 81.3 to 813 N-m 8,135 to 81,350 N-cm 8.3 to 83 kgf-m 830 to 8,295 kgf-cm | Clockwise and Counterclockwise | ±1% | ±1% | 8 | 5833A27 | 000000 | ||
Hand-Turned Sensors with Calibration Certificate Traceable to NIST
Accuracy | |||||||||
|---|---|---|---|---|---|---|---|---|---|
Square Drive Size (Gender) | Torque Range | Torque-Measuring Direction | Clockwise | Counterclockwise | Cord Lg., ft. | Each | |||
in·ozf, in·lbf, ft·lbf, N-m, N-cm, kgf-m, kgf-cm, | |||||||||
| 1/4" (Male) | 2 to 20 in·ozf 0.125 to 1.25 in·lbf 0.01 to 0.104 ft·lbf 0.014 to 0.141 N-m 1.41 to 14.1 N-cm 0.001 to 0.014 kgf-m 0.144 to 1.44 kgf-cm | Clockwise and Counterclockwise | ±2% | ±2% | 4 | 5833A25 | 0000000 | ||
| 1/4" (Male) | 16 to 160 in·ozf 1 to 10 in·lbf 0.083 to 0.833 ft·lbf 0.113 to 1.13 N-m 11.3 to 113 N-cm 0.012 to 0.115 kgf-m 1.15 to 11.5 kgf-cm | Clockwise and Counterclockwise | ±2% | ±2% | 4 | 5833A26 | 000000 | ||
High-Accuracy Torque Tool Gauges
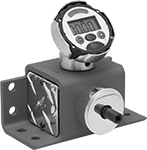
Bench Top with Digital Display
Accuracy | Mounting Holes | |||||||||||||||||
|---|---|---|---|---|---|---|---|---|---|---|---|---|---|---|---|---|---|---|
Square Drive Size | Torque Range | Graduations | Torque-Measuring Direction | Clockwise | Counterclockwise | For Tool Type | Ht. | Wd. | Dp. | Mounting Fasteners Included | No. of | Dia. | Batteries Included | Includes | Each | |||
Torque Gauges with Calibration Certificate Traceable to NIST | ||||||||||||||||||
in·lbf, ft·lbf, N-m, | ||||||||||||||||||
| 1/4" | 5 to 50 in·lbf 0.4 to 4.17 ft·lbf 0.56 to 5.65 N-m | 0.01 in·lbf 0.01 ft·lbf 0.01 N-m | Clockwise and Counterclockwise | ±1% | ±1% | Hand Tools | 4 1/2" | 6" | 6" | No | 8 | 3/8" | Yes | Female Drive Adapter | 4457A41 | 000000000 | ||
| 3/8" | 25 to 250 in·lbf 2 to 21 ft·lbf 2.8 to 28.2 N-m | 0.1 in·lbf 0.01 ft·lbf 0.01 N-m | Clockwise and Counterclockwise | ±1% | ±1% | Hand Tools | 4 1/2" | 6" | 6" | No | 8 | 3/8" | Yes | Female Drive Adapter | 4457A43 | 00000000 | ||
| 3/8" | 60 to 600 in·lbf 5 to 50 ft·lbf 6.78 to 67.8 N-m | 0.1 in·lbf 0.01 ft·lbf 0.1 N-m | Clockwise and Counterclockwise | ±1% | ±1% | Hand Tools | 4 1/2" | 6" | 6" | No | 8 | 3/8" | Yes | Female Drive Adapter | 4457A44 | 00000000 | ||
| 1/2" | 300 to 3,000 in·lbf 25 to 250 ft·lbf 33.8 to 338 N-m | 1 in·lbf 0.1 ft·lbf 0.1 N-m | Clockwise and Counterclockwise | ±1% | ±1% | Hand Tools | 4 1/2" | 6" | 6" | No | 8 | 3/8" | Yes | Female Drive Adapter | 4457A45 | 00000000 | ||
| 3/4" | 720 to 7,200 in·lbf 60 to 600 ft·lbf 81.3 to 813 N-m | 1 in·lbf 0.1 ft·lbf 0.1 N-m | Clockwise and Counterclockwise | ±1% | ±1% | Hand Tools | 4 1/2" | 6" | 6" | No | 8 | 3/8" | Yes | Female Drive Adapter | 4457A46 | 00000000 | ||
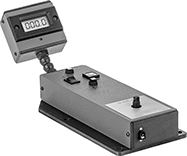
Bench Top with Gooseneck Digital Display
Accuracy | Mounting Holes | ||||||||||||||||
|---|---|---|---|---|---|---|---|---|---|---|---|---|---|---|---|---|---|
Square Drive Size | Torque Range | Graduations | Torque-Measuring Direction | Clockwise | Counterclockwise | For Tool Type | Ht. | Wd. | Dp. | Mounting Fasteners Included | No. of | Dia. | Includes | Each | |||
Torque Gauges with Calibration Certificate Traceable to NIST | |||||||||||||||||
ft·lbf, N-m, | |||||||||||||||||
| 1/2" | 25 to 250 ft·lbf 34 to 339 N-m | 1 ft·lbf 1 N-m | Clockwise and Counterclockwise | ±0.5% | ±0.5% | Hand Tools | 2 1/2" | 4 1/2" | 14 1/2" | No | 6 | 5/16" | Carrying Case, Female Drive Adapter | 4457A17 | 000000000 | ||
| 3/4" | 60 to 600 ft·lbf 81 to 813 N-m | 1 ft·lbf 1 N-m | Clockwise and Counterclockwise | ±0.5% | ±0.5% | Hand Tools | 2 1/2" | 4 1/2" | 14 1/2" | No | 6 | 5/16" | Carrying Case, Female Drive Adapter | 4457A18 | 00000000 | ||
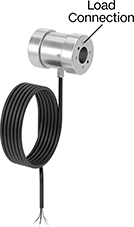
Torque Sensors
Accuracy | Sensors | PC Connection Kits | PLC Connection Kits | Wireless PC Connection Kits | ||||||||||||
|---|---|---|---|---|---|---|---|---|---|---|---|---|---|---|---|---|
Torque Range, N-m | N Torque Measuring Increments, N-m | Torque-Measuring Direction | Counterclockwise | Clockwise | Dia. | Ht. | Sensor Material | Each | Each | Each | Each | |||||
| 0.1 to 6 | 0.01 | Clockwise and Counterclockwise | ±1% | ±1% | 1 1/2" | 2" | Aluminum | 7570N11 | 0000000 | 7570N15 | 000000000 | 7570N19 | 000000000 | 7570N24 | 000000000 | |
| 0.1 to 10 | 0.01 | Clockwise and Counterclockwise | ±1% | ±1% | 1 1/2" | 2" | Aluminum | 7570N12 | 000000 | 7570N16 | 00000000 | 7570N21 | 00000000 | 7570N25 | 00000000 | |
| 0.1 to 60 | 0.06 | Clockwise and Counterclockwise | ±1% | ±1% | 1 1/2" | 2" | Aluminum | 7570N13 | 000000 | 7570N17 | 00000000 | 7570N22 | 00000000 | 7570N26 | 00000000 | |
| 0.1 to 150 | 0.15 | Clockwise and Counterclockwise | ±1% | ±1% | 1 1/2" | 2" | Aluminum | 7570N14 | 000000 | 7570N18 | 00000000 | 7570N23 | 00000000 | 7570N27 | 00000000 | |
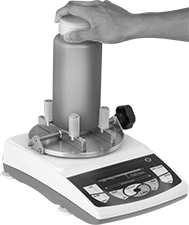
Opening-and-Closing Torque Gauges for Caps and Knobs
Accuracy | Clamp | Electrical | |||||||||||||||||
|---|---|---|---|---|---|---|---|---|---|---|---|---|---|---|---|---|---|---|---|
Torque Range | Graduations | Torque-Measuring Direction | Clockwise | Counterclockwise | Ht. | Wd. | Dp. | Ht. | Opening Range | Voltage, V AC | Connection | No. of Blades | Cord Lg., ft. | Operating Mode | Includes | Each | |||
Torque Gauges | |||||||||||||||||||
in·lbf, gf-m, N-m | |||||||||||||||||||
| 0.01 to 17 in·lbf 0.1 to 200 gf-m 0.001 to 2 N-m | 0.01 in·lbf 0.1 gf-m 0.001 N-m | Clockwise and Counterclockwise | ±0.5% | ±0.5% | 6" | 9 1/4" | 13 1/2" | 1 1/2" | 0.813" to 7" | 120 | Straight Blade | 2 | 5 | Applied, Fill Meter, Multipeak, Pass/Fail, Peak, Peak Sensitivity, Standard | Analog I/O Cable, microSD Card, RS232 Printer Cable, Wireless Dongle Receiver | 3519N11 | 000000000 | ||
| 0.01 to 44 in·lbf 0.1 to 500 gf-m 0.001 to 5 N-m | 0.01 in·lbf 0.1 gf-m 0.001 N-m | Clockwise and Counterclockwise | ±0.5% | ±0.5% | 6" | 9 1/4" | 13 1/2" | 1 1/2" | 0.813" to 7" | 120 | Straight Blade | 2 | 5 | Applied, Fill Meter, Multipeak, Pass/Fail, Peak, Peak Sensitivity, Standard | Analog I/O Cable, microSD Card, RS232 Printer Cable, Wireless Dongle Receiver | 3519N12 | 00000000 | ||
| 0.1 to 100 in·lbf 0.1 to 1,000 gf-m 0.01 to 10 N-m | 0.1 in·lbf 1 gf-m 0.01 N-m | Clockwise and Counterclockwise | ±0.5% | ±0.5% | 6" | 9 1/4" | 13 1/2" | 1 1/2" | 0.813" to 7" | 120 | Straight Blade | 2 | 5 | Applied, Fill Meter, Multipeak, Pass/Fail, Peak, Peak Sensitivity, Standard | Analog I/O Cable, microSD Card, RS232 Printer Cable, Wireless Dongle Receiver | 3519N13 | 00000000 | ||
Torque Gauges with Calibration Certificate Traceable to NIST | |||||||||||||||||||
in·lbf, gf-m, N-m | |||||||||||||||||||
| 0.01 to 17 in·lbf 0.1 to 200 gf-m 0.001 to 2 N-m | 0.01 in·lbf 0.1 gf-m 0.001 N-m | Clockwise and Counterclockwise | ±0.5% | ±0.5% | 6" | 9 1/4" | 13 1/2" | 1 1/2" | 0.813" to 7" | 120 | Straight Blade | 2 | 5 | Applied, Fill Meter, Multipeak, Pass/Fail, Peak, Peak Sensitivity, Standard | Analog I/O Cable, microSD Card, RS232 Printer Cable, Wireless Dongle Receiver | 3519N14 | 00000000 | ||
| 0.01 to 44 in·lbf 0.1 to 500 gf-m 0.001 to 5 N-m | 0.01 in·lbf 0.1 gf-m 0.001 N-m | Clockwise and Counterclockwise | ±0.5% | ±0.5% | 6" | 9 1/4" | 13 1/2" | 1 1/2" | 0.813" to 7" | 120 | Straight Blade | 2 | 5 | Applied, Fill Meter, Multipeak, Pass/Fail, Peak, Peak Sensitivity, Standard | Analog I/O Cable, microSD Card, RS232 Printer Cable, Wireless Dongle Receiver | 3519N15 | 00000000 | ||
| 0.1 to 100 in·lbf 0.1 to 1,000 gf-m 0.01 to 10 N-m | 0.1 in·lbf 1 gf-m 0.01 N-m | Clockwise and Counterclockwise | ±0.5% | ±0.5% | 6" | 9 1/4" | 13 1/2" | 1 1/2" | 0.813" to 7" | 120 | Straight Blade | 2 | 5 | Applied, Fill Meter, Multipeak, Pass/Fail, Peak, Peak Sensitivity, Standard | Analog I/O Cable, microSD Card, RS232 Printer Cable, Wireless Dongle Receiver | 3519N16 | 00000000 | ||
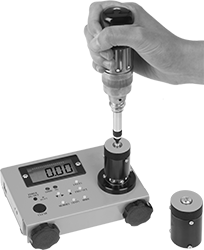
Torque Tool Gauges for Torque Screwdrivers
Torque Gauges | Cords | |||||||||||||||
|---|---|---|---|---|---|---|---|---|---|---|---|---|---|---|---|---|
Accuracy | ||||||||||||||||
Screw Drive Size | Square Drive Size | Torque Range | Graduations | Clockwise | Counterclockwise | Features | Battery Type | Display Type | Includes | Cannot Be Sold To | Each | Each | ||||
Torque Gauges with Calibration Certificate Traceable to NIST | ||||||||||||||||
in·lbf, kgf-cm, N-cm, N-m | ||||||||||||||||
| No. 2, No. 3 | 3/8" | 0.2 to 69.7 in·lbf 0.2 to 80 kgf-cm 2 to 786 N-cm 0.02 to 7.86 N-m | 0.01 in·lbf 0.01 kgf-cm 0.1 N-cm 0.001 N-m | ±0.5% | ±0.5% | Automatic Screw Release | Rechargeable | LED | 2 Joints (High- and Low-Torque), Carrying Case | California, Oregon | 3473N2 | 000000000 | 3472N4 | 000000 | ||
in·lbf, kgf-cm, N-m | ||||||||||||||||
| No. 4 | 3/8" | 1.8 to 221.2 in·lbf 2 to 255 kgf-cm 0.2 to 25 N-m | 0.1 in·lbf 0.1 kgf-cm 0.01 N-m | ±0.5% | ±0.5% | — | Rechargeable | LED | 2 Joints (High- and Low-Torque), Carrying Case | California, Oregon | 3473N101 | 00000000 | 3473N5 | 00000 | ||
Torque Gauges with Calibration Certificate Traceable to NIST—ISO/IEC 17025 | ||||||||||||||||
in·lbf, kgf-cm, N-cm, N-m | ||||||||||||||||
| No. 2, No. 3 | 3/8" | 0.2 to 69.7 in·lbf 0.2 to 80 kgf-cm 2 to 786 N-cm 0.02 to 7.86 N-m | 0.01 in·lbf 0.01 kgf-cm 0.1 N-cm 0.001 N-m | ±0.5% | ±0.5% | Automatic Screw Release | Rechargeable | LED | 2 Joints (High- and Low-Torque), Carrying Case | California, Oregon | 3473N4 | 00000000 | 3472N4 | 00000 | ||
in·lbf, kgf-cm, N-m | ||||||||||||||||
| No. 4 | 3/8" | 1.8 to 221.2 in·lbf 2 to 255 kgf-cm 0.2 to 25 N-m | 0.1 in·lbf 0.1 kgf-cm 0.01 N-m | ±0.5% | ±0.5% | — | Rechargeable | LED | 2 Joints (High- and Low-Torque), Carrying Case | California, Oregon | 3473N102 | 00000000 | 3473N5 | 00000 | ||
Rotary Torque Gauges
Accuracy | ||||||||||||||
|---|---|---|---|---|---|---|---|---|---|---|---|---|---|---|
Square Drive Size | Torque Range | Graduations | Clockwise | Counterclockwise | Lg. | OD | Features | Battery Type | Battery Charger Included | Includes | Each | |||
USB-B Connection | ||||||||||||||
| 1/4" | 280 to 1,400 in·ozf 17.6 to 88 in·lbf 1.5 to 7.3 ft·lbf 20 to 100 kgf-cm 0.2 to 1 kgf-m 200 to 1,000 N-cm 2 to 10 N-m | 1 in·ozf 0.1 in·lbf 0.01 ft·lbf 0.1 kgf-cm 0.001 kgf-m 1 N-cm 0.01 N-m | ±1% | ±1% | 2 15/16" | 1 13/16" | Plug Cover, Torque Measurement Memory | Rechargeable | Yes | 6 1/2 ft. Long USB Cord, AC Adapter | 7589N11 | 000000000 | ||
| 3/8" | 560 to 2,800 in·ozf 35 to 175 in·lbf 3 to 14.5 ft·lbf 40 to 200 kgf-cm 0.4 to 2 kgf-m 400 to 2,000 N-cm 4 to 20 N-m | 2 in·ozf 0.2 in·lbf 0.02 ft·lbf 0.2 kgf-cm 0.002 kgf-m 2 N-cm 0.02 N-m | ±1% | ±1% | 2 15/16" | 1 13/16" | Plug Cover, Torque Measurement Memory | Rechargeable | Yes | 6 1/2 ft. Long USB Cord, AC Adapter | 7589N12 | 00000000 | ||
| 3/8" | 1,400 to 7,000 in·ozf 88 to 440 in·lbf 7.5 to 36.5 ft·lbf 100 to 500 kgf-cm 1 to 5 kgf-m 1,000 to 5,000 N-cm 10 to 50 N-m | 5 in·ozf 0.5 in·lbf 0.05 ft·lbf 0.5 kgf-cm 0.005 kgf-m 5 N-cm 0.05 N-m | ±1% | ±1% | 2 15/16" | 1 13/16" | Plug Cover, Torque Measurement Memory | Rechargeable | Yes | 6 1/2 ft. Long USB Cord, AC Adapter | 7589N13 | 00000000 | ||
| 1/2" | 176 to 880 in·lbf 15 to 73 ft·lbf 200 to 1,000 kgf-cm 2 to 10 kgf-m 20 to 100 N-m | 1 in·lbf 0.1 ft·lbf 1 kgf-cm 0.01 kgf-m 0.1 N-m | ±1% | ±1% | 2 15/16" | 1 13/16" | Plug Cover, Torque Measurement Memory | Rechargeable | Yes | 6 1/2 ft. Long USB Cord, AC Adapter | 7589N14 | 00000000 | ||
| 1/2" | 350 to 1,750 in·lbf 30 to 145 ft·lbf 400 to 2,000 kgf-cm 4 to 20 kgf-m 40 to 200 N-m | 2 in·lbf 0.2 ft·lbf 2 kgf-cm 0.02 kgf-m 0.2 N-m | ±1% | ±1% | 2 15/16" | 1 13/16" | Plug Cover, Torque Measurement Memory | Rechargeable | Yes | 6 1/2 ft. Long USB Cord, AC Adapter | 7589N15 | 00000000 | ||
Bluetooth Connection | ||||||||||||||
| 1/4" | 280 to 1,400 in·ozf 17.6 to 88 in·lbf 1.5 to 7.3 ft·lbf 20 to 100 kgf-cm 0.2 to 1 kgf-m 200 to 1,000 N-cm 2 to 10 N-m | 1 in·ozf 0.1 in·lbf 0.01 ft·lbf 0.1 kgf-cm 0.001 kgf-m 1 N-cm 0.01 N-m | ±1% | ±1% | 2 15/16" | 1 15/16" | Plug Cover, Torque Measurement Memory | Rechargeable | Yes | AC Adapter | 7589N16 | 00000000 | ||
| 3/8" | 560 to 2,800 in·ozf 35 to 175 in·lbf 3 to 14.5 ft·lbf 40 to 200 kgf-cm 0.4 to 2 kgf-m 400 to 2,000 N-cm 4 to 20 N-m | 2 in·ozf 0.2 in·lbf 0.02 ft·lbf 0.2 kgf-cm 0.002 kgf-m 2 N-cm 0.02 N-m | ±1% | ±1% | 2 15/16" | 1 15/16" | Plug Cover, Torque Measurement Memory | Rechargeable | Yes | AC Adapter | 7589N17 | 00000000 | ||
| 3/8" | 1,400 to 7,000 in·ozf 88 to 440 in·lbf 7.5 to 36.5 ft·lbf 100 to 500 kgf-cm 1 to 5 kgf-m 1,000 to 5,000 N-cm 10 to 50 N-m | 5 in·ozf 0.5 in·lbf 0.05 ft·lbf 0.5 kgf-cm 0.005 kgf-m 5 N-cm 0.05 N-m | ±1% | ±1% | 2 15/16" | 1 15/16" | Plug Cover, Torque Measurement Memory | Rechargeable | Yes | AC Adapter | 7589N18 | 00000000 | ||
| 1/2" | 176 to 880 in·lbf 15 to 73 ft·lbf 200 to 1,000 kgf-cm 2 to 10 kgf-m 20 to 100 N-m | 1 in·lbf 0.1 ft·lbf 1 kgf-cm 0.01 kgf-m 0.1 N-m | ±1% | ±1% | 2 15/16" | 1 15/16" | Plug Cover, Torque Measurement Memory | Rechargeable | Yes | AC Adapter | 7589N19 | 00000000 | ||
| 1/2" | 350 to 1,750 in·lbf 30 to 145 ft·lbf 400 to 2,000 kgf-cm 4 to 20 kgf-m 40 to 200 N-m | 2 in·lbf 0.2 ft·lbf 2 kgf-cm 0.02 kgf-m 0.2 N-m | ±1% | ±1% | 2 15/16" | 1 15/16" | Plug Cover, Torque Measurement Memory | Rechargeable | Yes | AC Adapter | 7589N21 | 00000000 | ||


