How to Install Helical Inserts
More
About Helical Insert Length
More
Stainless Steel Helical Inserts

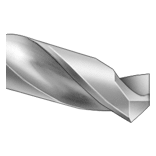
Also known as Heli-Coil inserts, these inserts have coils that expand once installed to securely anchor the insert. All have a prong for ease of installation. An installation tool grips the prong and reduces the coil diameter, enabling the insert to fit in tapped holes. Remove the prong to insert the screw. Installation requires a drill bit, a helical insert tap, an installation tool, and a prong break-off tool.
Installation Tools for Helical Inserts
Screw an insert onto these tools and drive them a quarter to half-turn below the material’s surface. They’re compatible with helical inserts that have a prong.
| For Thread Size | Style | Each | |
For Right-Hand Thread | |||
|---|---|---|---|
| 1 1/2"-8 | K | 000000000 | 000000 |
Extraction Tools for Helical Inserts
Place the tip of these tools into an insert and strike a light blow to the tool’s head. Then turn the tools counterclockwise with pressure to extract the insert.
| For Thread Size | Each | |
| 1 1/8"-7, 1 1/8"-12, 1 1/4"-7, 1 1/4"-8, 1 1/4"-12, 1 3/8"-6, 1 3/8"-12, 1 1/2"-6, 1 1/2"-8, 1 1/2"-12, M27, M30, M36, M39 | 000000000 | 0000000 |
