Filter by
Handle Material
Usable Length

Fastener Head Type


Length
End Type


Finish
Wire Diameter


Performance
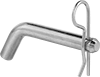
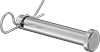
Clevis Pin Diameter
Minimum Hardness
Shaft Type
Head Diameter
Export Control Classification Number (ECCN)
DFARS Specialty Metals
Eye Diameter
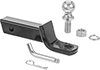
Fastening and Joining

Material Handling