


Filter by

Mounting Location


Current per Circuit
DIN Rail Trade Size

DIN Rail Height
Electrical Connection
Width
Length
Certification
DFARS Specialty Metals
Export Control Classification Number (ECCN)
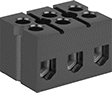
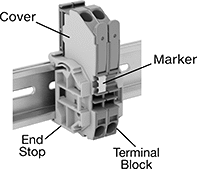
Modular DIN-Rail Mount Terminal Blocks
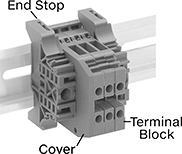 |
Mix and match these terminal blocks to get the exact number of circuits you need in a single setup. Add blocks for thermocouples, fuses, and grounding wire as needed. The blocks clip side by side onto DIN rail in control panels, creating tidy rows of circuits that you can identify and access on the spot.
The screw-clamp terminals flatten your wire so it stays put when vibrated or pulled. If you need to change wiring frequently without adjusting a screw, consider a quick-connect terminal block with spring-clamp or lever-clamp terminals.
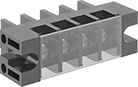
Terminal Blocks with Screw-Clamp Terminals
 |
Covers—Snap onto the exposed side of a terminal block to prevent accidental contact with a live wire.
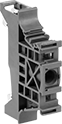
End Stops—Mount at the end of a group of terminal blocks so they don't slide when vibrated or bumped.
Bar Jumpers—Metal poles create an electrical connection between blocks, so you can connect multiple components with a single wire. Blocks must be the same width for the jumpers to fit. Cut jumpers to size with a hacksaw or high-force wire cutter. Add covers so jumpers don't touch the screws on the outermost blocks.
Insulation—Terminal blocks with insulated jumpers maintain their IP20 rating to prevent shocks and short circuits. Blocks with noninsulated jumpers lose their IP20 rating for touch protection because the jumpers introduce exposed metal to the circuit.
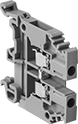
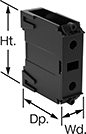
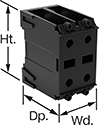
Terminal Blocks
 |
Terminal Blocks | Covers | Markers | |||||||||||||||||||||||||||||||||||||||||||||||||||||||||||||||||||||||||||||||||||||||||||||||||
|---|---|---|---|---|---|---|---|---|---|---|---|---|---|---|---|---|---|---|---|---|---|---|---|---|---|---|---|---|---|---|---|---|---|---|---|---|---|---|---|---|---|---|---|---|---|---|---|---|---|---|---|---|---|---|---|---|---|---|---|---|---|---|---|---|---|---|---|---|---|---|---|---|---|---|---|---|---|---|---|---|---|---|---|---|---|---|---|---|---|---|---|---|---|---|---|---|---|---|---|
Mounting Holes | |||||||||||||||||||||||||||||||||||||||||||||||||||||||||||||||||||||||||||||||||||||||||||||||||||
No. of Circuits | For Wire Ga. | Wire Connection | Terminal Size | Terminal Ctr.-to-Ctr. | Lg. | Wd. | Ht. | Max. Temp., ° F | Color | For DIN Rail Trade Size | Dia. | No. of | Each | Each | Each | ||||||||||||||||||||||||||||||||||||||||||||||||||||||||||||||||||||||||||||||||||||
300V AC/300V DC—20 amp per Circuit | |||||||||||||||||||||||||||||||||||||||||||||||||||||||||||||||||||||||||||||||||||||||||||||||||||
| 3 | 22 to 12 | Screw Terminal | No. 6 | 3/8" | 1 3/4" | 7/8" | 1/2" | 257 | Black | — | 0.17" | 4 | 7527K43 | 00000 | 7527K827 | 00000 | 7527K152 | 00000 | |||||||||||||||||||||||||||||||||||||||||||||||||||||||||||||||||||||||||||||||||
300V AC/300V DC—30 amp per Circuit | |||||||||||||||||||||||||||||||||||||||||||||||||||||||||||||||||||||||||||||||||||||||||||||||||||
| 3 | 22 to 12 | Screw Terminal | No. 6 | 7/16" | 2 1/16" | 1 1/8" | 1/2" | 257 | Black | — | 0.18" | 4 | 7527K63 | 0000 | 7527K937 | 0000 | 7527K172 | 0000 | |||||||||||||||||||||||||||||||||||||||||||||||||||||||||||||||||||||||||||||||||
600V AC/600V DC—20 amp per Circuit | |||||||||||||||||||||||||||||||||||||||||||||||||||||||||||||||||||||||||||||||||||||||||||||||||||
| 3 | 22 to 12 | Screw Terminal | No. 6 | 7/16" | 2 1/16" | 1 3/8" | 3/4" | 257 | Black | — | 0.18" | 4 | 5566T82 | 0000 | 5566T622 | 00000 | 5566T112 | 0000 | |||||||||||||||||||||||||||||||||||||||||||||||||||||||||||||||||||||||||||||||||
600V AC/600V DC—30 amp per Circuit | |||||||||||||||||||||||||||||||||||||||||||||||||||||||||||||||||||||||||||||||||||||||||||||||||||
| 3 | 14 to 12 | Screw Terminal | No. 8 | 9/16" | 2 11/16" | 1 5/16" | 11/16" | 257 | Black | — | 0.22" | 4 | 5566T32 | 0000 | 7527K352 | 0000 | 5566T312 | 0000 | |||||||||||||||||||||||||||||||||||||||||||||||||||||||||||||||||||||||||||||||||
600V AC/600V DC—75 amp per Circuit | |||||||||||||||||||||||||||||||||||||||||||||||||||||||||||||||||||||||||||||||||||||||||||||||||||
| 3 | 14 to 6 | Screw Terminal | No. 10 | 11/16" | 3 3/16" | 1 13/16" | 3/4" | 266 | Black | — | 0.22" | 4 | 5566T523 | 00000 | ——— | 0 | ——— | 0 | |||||||||||||||||||||||||||||||||||||||||||||||||||||||||||||||||||||||||||||||||
600V AC/600V DC—200 amp per Circuit | |||||||||||||||||||||||||||||||||||||||||||||||||||||||||||||||||||||||||||||||||||||||||||||||||||
| 3 | 14 to 2 | Stud Terminal | 1/4" | 13/16" | 2 9/16" | 3" | 2 7/16" | 257 | Black | 3 | 0.22" | 6 | 5566T78 | 00000 | ——— | 0 | ——— | 0 | |||||||||||||||||||||||||||||||||||||||||||||||||||||||||||||||||||||||||||||||||
Over Barrier Jumper |
Around Barrier Jumper |
For No. of Circuits | For Terminal Block Voltage | Pkg. Qty. | Pkg. | ||||||||||||||||||||||||||||||||||||||||||||||||||||||||||||||||||||||||||||||||||||||||||||||||
|---|---|---|---|---|---|---|---|---|---|---|---|---|---|---|---|---|---|---|---|---|---|---|---|---|---|---|---|---|---|---|---|---|---|---|---|---|---|---|---|---|---|---|---|---|---|---|---|---|---|---|---|---|---|---|---|---|---|---|---|---|---|---|---|---|---|---|---|---|---|---|---|---|---|---|---|---|---|---|---|---|---|---|---|---|---|---|---|---|---|---|---|---|---|---|---|---|---|---|---|
Over-Barrier Jumper | |||||||||||||||||||||||||||||||||||||||||||||||||||||||||||||||||||||||||||||||||||||||||||||||||||
For 3/8" Terminal Center-to-Center | |||||||||||||||||||||||||||||||||||||||||||||||||||||||||||||||||||||||||||||||||||||||||||||||||||
| 2 | 300V AC/300V DC | 25 | 7527K59 | 000000 | |||||||||||||||||||||||||||||||||||||||||||||||||||||||||||||||||||||||||||||||||||||||||||||||
For 7/16" Terminal Center-to-Center | |||||||||||||||||||||||||||||||||||||||||||||||||||||||||||||||||||||||||||||||||||||||||||||||||||
| 2 | 300V AC/300V DC | 25 | 7527K79 | 00000 | |||||||||||||||||||||||||||||||||||||||||||||||||||||||||||||||||||||||||||||||||||||||||||||||
| 2 | 600V AC/600V DC | 1 | 5566T26 | 0000 | |||||||||||||||||||||||||||||||||||||||||||||||||||||||||||||||||||||||||||||||||||||||||||||||
For 9/16" Terminal Center-to-Center | |||||||||||||||||||||||||||||||||||||||||||||||||||||||||||||||||||||||||||||||||||||||||||||||||||
| 2 | 600V AC/600V DC | 1 | 5566T46 | 0000 | |||||||||||||||||||||||||||||||||||||||||||||||||||||||||||||||||||||||||||||||||||||||||||||||
For 11/16" Terminal Center-to-Center | |||||||||||||||||||||||||||||||||||||||||||||||||||||||||||||||||||||||||||||||||||||||||||||||||||
| 2 | 600V AC/600V DC | 1 | 5566T67 | 0000 | |||||||||||||||||||||||||||||||||||||||||||||||||||||||||||||||||||||||||||||||||||||||||||||||
Around-Barrier Jumper | |||||||||||||||||||||||||||||||||||||||||||||||||||||||||||||||||||||||||||||||||||||||||||||||||||
For 3/8" Terminal Center-to-Center | |||||||||||||||||||||||||||||||||||||||||||||||||||||||||||||||||||||||||||||||||||||||||||||||||||
| 3 | 300V AC/300V DC | 1 | 7527K982 | 0000 | |||||||||||||||||||||||||||||||||||||||||||||||||||||||||||||||||||||||||||||||||||||||||||||||
For 7/16" Terminal Center-to-Center | |||||||||||||||||||||||||||||||||||||||||||||||||||||||||||||||||||||||||||||||||||||||||||||||||||
| 3 | 300V AC/300V DC/600V AC/600V DC | 1 | 5566T772 | 0000 | |||||||||||||||||||||||||||||||||||||||||||||||||||||||||||||||||||||||||||||||||||||||||||||||
Straight |
 |
90° Angle |
45° Angle |
Shape | For Terminal Block Voltage | Tab Wd. | Pkg. Qty. | Pkg. | |||||||||||||||||||||||||||||||||||||||||||||||||||||||||||||||||||||||||||||||||||||||||||||||
|---|---|---|---|---|---|---|---|---|---|---|---|---|---|---|---|---|---|---|---|---|---|---|---|---|---|---|---|---|---|---|---|---|---|---|---|---|---|---|---|---|---|---|---|---|---|---|---|---|---|---|---|---|---|---|---|---|---|---|---|---|---|---|---|---|---|---|---|---|---|---|---|---|---|---|---|---|---|---|---|---|---|---|---|---|---|---|---|---|---|---|---|---|---|---|---|---|---|---|---|
For 3/8" Terminal Center-to-Center | |||||||||||||||||||||||||||||||||||||||||||||||||||||||||||||||||||||||||||||||||||||||||||||||||||
| Straight | 300V AC/300V DC | 0.187" | 25 | 7527K11 | 000000 | ||||||||||||||||||||||||||||||||||||||||||||||||||||||||||||||||||||||||||||||||||||||||||||||
| 90° Angle | 300V AC/300V DC | 0.187" | 25 | 7527K58 | 00000 | ||||||||||||||||||||||||||||||||||||||||||||||||||||||||||||||||||||||||||||||||||||||||||||||
| 45° Angle | 300V AC/300V DC | 0.187" | 25 | 7527K57 | 00000 | ||||||||||||||||||||||||||||||||||||||||||||||||||||||||||||||||||||||||||||||||||||||||||||||
For 7/16" Terminal Center-to-Center | |||||||||||||||||||||||||||||||||||||||||||||||||||||||||||||||||||||||||||||||||||||||||||||||||||
| Straight | 300V AC/300V DC/600V AC/600V DC | 0.250" | 25 | 7527K12 | 00000 | ||||||||||||||||||||||||||||||||||||||||||||||||||||||||||||||||||||||||||||||||||||||||||||||
| 90° Angle | 300V AC/300V DC/600V AC/600V DC | 0.250" | 25 | 7527K78 | 00000 | ||||||||||||||||||||||||||||||||||||||||||||||||||||||||||||||||||||||||||||||||||||||||||||||
| 45° Angle | 300V AC/300V DC/600V AC/600V DC | 0.250" | 25 | 7527K77 | 00000 | ||||||||||||||||||||||||||||||||||||||||||||||||||||||||||||||||||||||||||||||||||||||||||||||
For 9/16" Terminal Center-to-Center | |||||||||||||||||||||||||||||||||||||||||||||||||||||||||||||||||||||||||||||||||||||||||||||||||||
| Straight | 300V AC/300V DC/600V AC/600V DC | 0.250" | 25 | 7527K13 | 00000 | ||||||||||||||||||||||||||||||||||||||||||||||||||||||||||||||||||||||||||||||||||||||||||||||
| 90° Angle | 300V AC/300V DC/600V AC/600V DC | 0.250" | 25 | 7527K38 | 00000 | ||||||||||||||||||||||||||||||||||||||||||||||||||||||||||||||||||||||||||||||||||||||||||||||
| 45° Angle | 300V AC/300V DC/600V AC/600V DC | 0.250" | 25 | 7527K37 | 00000 | ||||||||||||||||||||||||||||||||||||||||||||||||||||||||||||||||||||||||||||||||||||||||||||||
High-Temperature Terminal Blocks
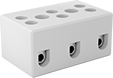 |
These ceramic terminal blocks keep their shape and strength at temperatures up to 1,200° F—over four times higher than standard blocks. Mount them to surfaces in ovens, kilns, and other heat-generating equipment.
Screw-Clamp-Terminal Wire Connection—The clamp flattens the wire to resist pullout and vibration better than screw terminals. For an even stronger and more conductive connection, crimp a terminal or wire ferrule onto the end of the wire.
Mounting Holes | |||||||||||||||||||||||||||||||||||||||||||||||||||||||||||||||||||||||||||||||||||||||||||||||||||
|---|---|---|---|---|---|---|---|---|---|---|---|---|---|---|---|---|---|---|---|---|---|---|---|---|---|---|---|---|---|---|---|---|---|---|---|---|---|---|---|---|---|---|---|---|---|---|---|---|---|---|---|---|---|---|---|---|---|---|---|---|---|---|---|---|---|---|---|---|---|---|---|---|---|---|---|---|---|---|---|---|---|---|---|---|---|---|---|---|---|---|---|---|---|---|---|---|---|---|---|
No. of Circuits | For Wire Ga. | Wire Connection | Terminal Size | Terminal Ctr.-to-Ctr. | Lg. | Wd. | Ht. | Max. Temp., ° F | Material | Color | Dia. | No. of | Each | ||||||||||||||||||||||||||||||||||||||||||||||||||||||||||||||||||||||||||||||||||||||
300V AC/300V DC—20 amp per Circuit | |||||||||||||||||||||||||||||||||||||||||||||||||||||||||||||||||||||||||||||||||||||||||||||||||||
| 3 | 24 to 12 | Screw Terminal | M3 | 5/16" | 1" | 15/16" | 3/4" | 1,200 | Ceramic | White | — | — | 5602T33 | 00000 | |||||||||||||||||||||||||||||||||||||||||||||||||||||||||||||||||||||||||||||||||||||
| 3 | 24 to 12 | Screw Terminal | M3 | 1/2" | 1 7/16" | 15/16" | 3/4" | 1,200 | Ceramic | White | 0.14" | 2 | 5602T34 | 0000 | |||||||||||||||||||||||||||||||||||||||||||||||||||||||||||||||||||||||||||||||||||||
300V AC/300V DC—30 amp per Circuit | |||||||||||||||||||||||||||||||||||||||||||||||||||||||||||||||||||||||||||||||||||||||||||||||||||
| 3 | 22 to 10 | Screw Terminal | M3 | 9/16" | 1 5/8" | 1" | 3/4" | 1,200 | Ceramic | White | 0.14" | 2 | 5602T23 | 0000 | |||||||||||||||||||||||||||||||||||||||||||||||||||||||||||||||||||||||||||||||||||||
300V AC/300V DC—65 amp per Circuit | |||||||||||||||||||||||||||||||||||||||||||||||||||||||||||||||||||||||||||||||||||||||||||||||||||
| 3 | 18 to 6 | Screw Terminal | M3 | 11/16" | 1 7/8" | 1 1/16" | 15/16" | 1,200 | Ceramic | White | 0.14" | 2 | 5602T24 | 0000 | |||||||||||||||||||||||||||||||||||||||||||||||||||||||||||||||||||||||||||||||||||||
600V AC/600V DC—20 amp per Circuit | |||||||||||||||||||||||||||||||||||||||||||||||||||||||||||||||||||||||||||||||||||||||||||||||||||
| 3 | 20 to 12 | Screw-Clamp Terminal | No. 8 | 7/8" | 2 7/16" | 1 1/4" | 13/16" | 840 | Ceramic | Beige | 0.19" | 2 | 1322T12 | 00000 | |||||||||||||||||||||||||||||||||||||||||||||||||||||||||||||||||||||||||||||||||||||
Terminal Blocks for Motors
 |
Rotate the jumpers on these blocks to match wye (Y-shaped), delta, and other wiring layouts on three-phase motors. Each jumper connects two terminals positioned side by side, across the block, or on a diagonal.
For a reliable connection, attach a terminal to your wire before installing. Ring, spade, and hook terminals fit around the stud and hang on tightly, even in high-vibration setups. Pin terminals, blade terminals, and wire ferrules are easier to fit into the block, but they don't stay put as well as other terminals when vibrated or pulled.
Mounting Holes | |||||||||||||||||||||||||||||||||||||||||||||||||||||||||||||||||||||||||||||||||||||||||||||||||||
|---|---|---|---|---|---|---|---|---|---|---|---|---|---|---|---|---|---|---|---|---|---|---|---|---|---|---|---|---|---|---|---|---|---|---|---|---|---|---|---|---|---|---|---|---|---|---|---|---|---|---|---|---|---|---|---|---|---|---|---|---|---|---|---|---|---|---|---|---|---|---|---|---|---|---|---|---|---|---|---|---|---|---|---|---|---|---|---|---|---|---|---|---|---|---|---|---|---|---|---|
No. of Circuits | For Wire Ga. | Wire Connection | Terminal Size | Terminal Ctr.-to-Ctr. | Lg. | Wd. | Ht. | Max. Temp., ° F | Color | Dia. | No. of | Each | |||||||||||||||||||||||||||||||||||||||||||||||||||||||||||||||||||||||||||||||||||||||
1,000V AC/1,000V DC—35 amp per Circuit | |||||||||||||||||||||||||||||||||||||||||||||||||||||||||||||||||||||||||||||||||||||||||||||||||||
| 3 | 18 to 8 | Stud Terminal | M4 | 1 1/16" | 2 1/2" | 1 7/16" | 1 5/8" | 266 | Black | 0.23" | 2 | 3932N11 | 000000 | ||||||||||||||||||||||||||||||||||||||||||||||||||||||||||||||||||||||||||||||||||||||
1,000V AC/1,000V DC—160 amp per Circuit | |||||||||||||||||||||||||||||||||||||||||||||||||||||||||||||||||||||||||||||||||||||||||||||||||||
| 3 | 12 to 2/0 | Stud Terminal | M8 | 1 9/16" | 4 7/16" | 2 11/16" | 3" | 266 | Black | 0.35" | 2 | 3932N12 | 00000 | ||||||||||||||||||||||||||||||||||||||||||||||||||||||||||||||||||||||||||||||||||||||
1,000V AC/1,000V DC—315 amp per Circuit | |||||||||||||||||||||||||||||||||||||||||||||||||||||||||||||||||||||||||||||||||||||||||||||||||||
| 3 | 8 | Stud Terminal | M12 | 2 3/4" | 7 1/16" | 6 1/2" | 4 3/16" | 266 | Black | 0.43" | 4 | 3932N13 | 000000 | ||||||||||||||||||||||||||||||||||||||||||||||||||||||||||||||||||||||||||||||||||||||
Touch-Safe Terminal Blocks
 |  |
Style A | Style C |
These terminal blocks protect you from shocks and prevent short circuits. The terminals are recessed in the block, so you can't accidentally touch them when installing or adjusting your wire.
Screw-Clamp-Terminal Wire Connection—The clamp flattens the wire to resist pullout and vibration better than screw terminals. For an even stronger and more conductive connection, crimp a terminal or wire ferrule onto the end of the wire.
Mounting Holes | |||||||||||||||||||||||||||||||||||||||||||||||||||||||||||||||||||||||||||||||||||||||||||||||||||
|---|---|---|---|---|---|---|---|---|---|---|---|---|---|---|---|---|---|---|---|---|---|---|---|---|---|---|---|---|---|---|---|---|---|---|---|---|---|---|---|---|---|---|---|---|---|---|---|---|---|---|---|---|---|---|---|---|---|---|---|---|---|---|---|---|---|---|---|---|---|---|---|---|---|---|---|---|---|---|---|---|---|---|---|---|---|---|---|---|---|---|---|---|---|---|---|---|---|---|---|
Style | No. of Circuits | For Wire Ga. | Wire Connection | Terminal Size | Terminal Ctr.-to-Ctr. | Lg. | Wd. | Ht. | Max. Temp., ° F | Color | Dia. | No. of | Each | ||||||||||||||||||||||||||||||||||||||||||||||||||||||||||||||||||||||||||||||||||||||
600V AC/600V DC—20 amp per Circuit | |||||||||||||||||||||||||||||||||||||||||||||||||||||||||||||||||||||||||||||||||||||||||||||||||||
| A | 3 | 22 to 12 | Screw-Clamp Terminal | M3 | 5/16" | 7/8" | 3/4" | 3/4" | 221 | White | 0.12" | 2 | 7618K612 | 00000 | |||||||||||||||||||||||||||||||||||||||||||||||||||||||||||||||||||||||||||||||||||||
600V AC/600V DC—30 amp per Circuit | |||||||||||||||||||||||||||||||||||||||||||||||||||||||||||||||||||||||||||||||||||||||||||||||||||
| A | 3 | 18 to 10 | Screw-Clamp Terminal | M3 | 3/8" | 1 1/16" | 3/4" | 13/16" | 221 | White | 0.15" | 2 | 7618K632 | 0000 | |||||||||||||||||||||||||||||||||||||||||||||||||||||||||||||||||||||||||||||||||||||
600V AC/600V DC—40 amp per Circuit | |||||||||||||||||||||||||||||||||||||||||||||||||||||||||||||||||||||||||||||||||||||||||||||||||||
| A | 3 | 20 to 8 | Screw-Clamp Terminal | M3 | 1/2" | 1 1/4" | 15/16" | 7/8" | 221 | White | 0.17" | 2 | 7618K652 | 0000 | |||||||||||||||||||||||||||||||||||||||||||||||||||||||||||||||||||||||||||||||||||||
600V AC/600V DC—63 amp per Circuit | |||||||||||||||||||||||||||||||||||||||||||||||||||||||||||||||||||||||||||||||||||||||||||||||||||
| A | 3 | 14 to 6 | Screw-Clamp Terminal | M3 | 9/16" | 1 9/16" | 1 1/8" | 1 1/16" | 221 | White | 0.17" | 2 | 7618K672 | 0000 | |||||||||||||||||||||||||||||||||||||||||||||||||||||||||||||||||||||||||||||||||||||
600V AC/600V DC—85 amp per Circuit | |||||||||||||||||||||||||||||||||||||||||||||||||||||||||||||||||||||||||||||||||||||||||||||||||||
| C | 3 | 18 to 4 | Screw Terminal | 1/4" | 5/8" | 1 3/4" | 1 1/4" | 1 1/8" | 302 | Black | 0.18" | 2 | 9130K42 | 00000 | |||||||||||||||||||||||||||||||||||||||||||||||||||||||||||||||||||||||||||||||||||||
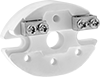
Distribution Blocks
Screw-Clamp Terminal Input Connection
 |  |
Terminal Block End Stop |
Blocks with a screw-clamp terminal input wire connection have a current rating based on NEC table 310-16 using 75° C copper wire.
Detachable Cover—Blocks with a detachable cover prevent accidental contact with live circuits.
Quick-Disconnect Load Connection—Blocks with a quick-disconnect load connection let you attach an auxiliary device, such as a horn or light.
End Stops—End stops (sold separately) mount at the end of a group of blocks to prevent movement.
Distribution Blocks | End Stops | ||||||||||||||||||||||||||||||||||||||||||||||||||||||||||||||||||||||||||||||||||||||||||||||||||
|---|---|---|---|---|---|---|---|---|---|---|---|---|---|---|---|---|---|---|---|---|---|---|---|---|---|---|---|---|---|---|---|---|---|---|---|---|---|---|---|---|---|---|---|---|---|---|---|---|---|---|---|---|---|---|---|---|---|---|---|---|---|---|---|---|---|---|---|---|---|---|---|---|---|---|---|---|---|---|---|---|---|---|---|---|---|---|---|---|---|---|---|---|---|---|---|---|---|---|---|
No. of Connections Per Circuit | |||||||||||||||||||||||||||||||||||||||||||||||||||||||||||||||||||||||||||||||||||||||||||||||||||
Current per Circuit, amp | Voltage | Input (For Wire Ga.) | Output (For Wire Ga.) | Wd. | Ht. | Dp. | Enclosure Rating | Certification | Flammability Rating | Features | Each | Each | |||||||||||||||||||||||||||||||||||||||||||||||||||||||||||||||||||||||||||||||||||||||
DIN-Rail Mount | |||||||||||||||||||||||||||||||||||||||||||||||||||||||||||||||||||||||||||||||||||||||||||||||||||
3 Circuits | |||||||||||||||||||||||||||||||||||||||||||||||||||||||||||||||||||||||||||||||||||||||||||||||||||
| 115 | 1,000V AC/1,000V DC | 1 (8-2) | 1 (10-6), 6 (14-6) | 3 5/16" | 3" | 2" | IP20, NEMA 1 | UL Recognized Component, CE Marked | — | — | 6367T33 | 000000 | 7641K35 | 00000 | |||||||||||||||||||||||||||||||||||||||||||||||||||||||||||||||||||||||||||||||||||||
| 175 | 600V AC/600V DC | 1 (14-2/0) | 1 (14-2/0) | 2 5/8" | 3" | 2 9/16" | — | UL Recognized Component, CSA Certified, CE Marked | UL 94 V-0 | Detachable Cover | 6367T13 | 00000 | ——— | 0 | |||||||||||||||||||||||||||||||||||||||||||||||||||||||||||||||||||||||||||||||||||||
| 175 | 600V AC/600V DC | 1 (14-2/0) | 4 (14-4) | 2 5/8" | 3" | 2 9/16" | — | UL Recognized Component, CSA Certified, CE Marked | UL 94 V-0 | Detachable Cover | 6367T16 | 00000 | ——— | 0 | |||||||||||||||||||||||||||||||||||||||||||||||||||||||||||||||||||||||||||||||||||||
| 175 | 600V AC/600V DC | 1 (14-2/0) | 4 (14-4) | 2 5/8" | 3" | 2 9/16" | — | UL Recognized Component, CSA Certified, CE Marked | UL 94 V-0 | Detachable Cover, Quick-Disconnect Load Connection | 6367T24 | 00000 | ——— | 0 | |||||||||||||||||||||||||||||||||||||||||||||||||||||||||||||||||||||||||||||||||||||
| 175 | 600V AC/600V DC | 1 (14-2/0) | 6 (14-4) | 2 5/8" | 3" | 2 9/16" | — | UL Recognized Component, CSA Certified, CE Marked | UL 94 V-0 | Detachable Cover | 6367T19 | 000000 | ——— | 0 | |||||||||||||||||||||||||||||||||||||||||||||||||||||||||||||||||||||||||||||||||||||
| 175 | 1,000V AC/1,000V DC | 1 (6-2/0) | 1 (10-6), 6 (14-6) | 3 5/16" | 3" | 2" | IP10, NEMA 1 | UL Recognized Component, CSA Certified, CE Marked | UL 94 V-0 | — | 6367T54 | 00000 | 7641K35 | 0000 | |||||||||||||||||||||||||||||||||||||||||||||||||||||||||||||||||||||||||||||||||||||
Surface Mount | |||||||||||||||||||||||||||||||||||||||||||||||||||||||||||||||||||||||||||||||||||||||||||||||||||
3 Circuits | |||||||||||||||||||||||||||||||||||||||||||||||||||||||||||||||||||||||||||||||||||||||||||||||||||
| 335 | 600V AC/600V DC | 1 (14-4/0) | 6 (14-2) | 5 5/8" | 5" | 3 15/16" | — | UL Listed, C-UL Listed | — | — | 6367T46 | 000000 | ——— | 0 | |||||||||||||||||||||||||||||||||||||||||||||||||||||||||||||||||||||||||||||||||||||
| 350 | 600V AC/600V DC | 2 (14-2/0) | 6 (14-4) | 5 5/8" | 5" | 3 15/16" | — | UL Listed, C-UL Listed | — | — | 6367T44 | 000000 | ——— | 0 | |||||||||||||||||||||||||||||||||||||||||||||||||||||||||||||||||||||||||||||||||||||
| 510 | 600V AC/600V DC | 2 (6-4/0) | 8 (14-2) | 5 5/8" | 5" | 3 15/16" | — | UL Listed, C-UL Listed | — | — | 6367T42 | 000000 | ——— | 0 | |||||||||||||||||||||||||||||||||||||||||||||||||||||||||||||||||||||||||||||||||||||
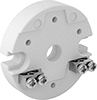
Stud-Terminal Input Connection
 |
Detachable Cover—Blocks with a detachable cover prevent accidental contact with live circuits.
No. of Connections Per Circuit | |||||||||||||||||||||||||||||||||||||||||||||||||||||||||||||||||||||||||||||||||||||||||||||||||||
|---|---|---|---|---|---|---|---|---|---|---|---|---|---|---|---|---|---|---|---|---|---|---|---|---|---|---|---|---|---|---|---|---|---|---|---|---|---|---|---|---|---|---|---|---|---|---|---|---|---|---|---|---|---|---|---|---|---|---|---|---|---|---|---|---|---|---|---|---|---|---|---|---|---|---|---|---|---|---|---|---|---|---|---|---|---|---|---|---|---|---|---|---|---|---|---|---|---|---|---|
Current per Circuit, amp | Voltage | Input (For Wire Ga.) | Output (For Wire Ga.) | Terminal Size | Wd. | Ht. | Dp. | Certification | Flammability Rating | Features | Each | ||||||||||||||||||||||||||||||||||||||||||||||||||||||||||||||||||||||||||||||||||||||||
DIN-Rail Mount | |||||||||||||||||||||||||||||||||||||||||||||||||||||||||||||||||||||||||||||||||||||||||||||||||||
3 Circuits | |||||||||||||||||||||||||||||||||||||||||||||||||||||||||||||||||||||||||||||||||||||||||||||||||||
| 200 | 600V AC/600V DC | 1 (14-3/0) | 1 (14-3/0) | 1/4" | 2 5/8" | 3" | 2 9/16" | UL Recognized Component, CSA Certified, CE Marked | UL 94 V-0 | Detachable Cover | 6367T36 | 000000 | |||||||||||||||||||||||||||||||||||||||||||||||||||||||||||||||||||||||||||||||||||||||
Surface Mount | |||||||||||||||||||||||||||||||||||||||||||||||||||||||||||||||||||||||||||||||||||||||||||||||||||
3 Circuits | |||||||||||||||||||||||||||||||||||||||||||||||||||||||||||||||||||||||||||||||||||||||||||||||||||
| 310 | 600V AC/600V DC | 1 (14-4/0) | 1 (14-4/0) | 3/8" | 5 3/8" | 4" | 3 1/2" | UL Recognized Component, CSA Certified | UL 94 V-0 | Detachable Cover | 6367T39 | 000000 | |||||||||||||||||||||||||||||||||||||||||||||||||||||||||||||||||||||||||||||||||||||||
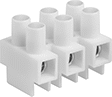
Quick-Connect Terminal Blocks
 |
Snap wire into place with a clamp instead of fussing with a screw. Release the spring clamp with a screwdriver, insert the wire, and push the clamp back down for a secure hold. For an easier fit in the small gaps in the block, attach a ferrule, pin terminal, or blade terminal before installing.
DIN Rail Mounting Adapters—Install terminal blocks on DIN 3 rail with these mounting brackets. You can mount two-circuit terminal blocks with one adapter. For all other blocks, you'll need two.
Terminal Blocks | DIN Rail Mounting Adapters | |||||||||||||||||
|---|---|---|---|---|---|---|---|---|---|---|---|---|---|---|---|---|---|---|
Mounting Holes | Black | White | ||||||||||||||||
No. of Circuits | No. of Terminals per Circuit | For Wire Ga. | Wire Connection | Terminal Ctr.-to-Ctr. | Lg. | Wd. | Ht. | Max. Temp., ° F | For DIN Rail Trade Size | Dia. | No. of | Each | Each | Each | ||||
| 3 | 4 | 20 to 12 | Spring-Clamp Terminal | 1/2" | 1 7/16" | 7/8" | 1 3/8" | 221 | 3 | 0.13" | 2 | 8841T21 | 00000 | 8841T22 | 00000 | 8841T7 | 00000 | |
Quick-Connect Modular DIN-Rail Mount Terminal Blocks
 |
Pop wire in and out of these terminal blocks without adjusting a screw. Lift the clamp with a screwdriver or built-in lever, then release the clamp down onto the wire. Once clamped in place, the wire will stay put when vibrated, bent, or pulled.
Mix and match these terminal blocks to get the exact number of circuits you need in a single setup. Add blocks for thermocouples, fuses, and grounding wire as needed. The blocks clip side by side onto DIN rail in control panels, creating tidy rows of circuits that you can identify and access on the spot.
Terminal Blocks with Spring-Clamp Terminals
Covers—Snap onto the exposed side of a terminal block to prevent accidental contact with a live wire.
End Stops—Mount at the end of a group of terminal blocks so they don't slide when vibrated or bumped.
Adjacent Jumpers—Metal poles create an electrical connection between adjacent terminal blocks, so you can connect multiple components with a single wire. Blocks must be the same width for the jumpers to fit.
Alternate Jumpers—Connect terminals on two blocks of the same width, skipping a block in between. This reduces wire clutter and gives you flexibility to adjust your set-up in the future.
Terminal Blocks | Covers | End Stops | Adjacent Jumpers | Alternate Jumpers | |||||||||||||||||||||||||||||||||||||||||||||||||||||||||||||||||||||||||||||||||||||||||||||||
|---|---|---|---|---|---|---|---|---|---|---|---|---|---|---|---|---|---|---|---|---|---|---|---|---|---|---|---|---|---|---|---|---|---|---|---|---|---|---|---|---|---|---|---|---|---|---|---|---|---|---|---|---|---|---|---|---|---|---|---|---|---|---|---|---|---|---|---|---|---|---|---|---|---|---|---|---|---|---|---|---|---|---|---|---|---|---|---|---|---|---|---|---|---|---|---|---|---|---|---|
Each | |||||||||||||||||||||||||||||||||||||||||||||||||||||||||||||||||||||||||||||||||||||||||||||||||||
No. of Circuits | No. of Terminals per Circuit | For Wire Ga. | Wd., mm | Ht., mm | For DIN Rail Trade Size | Choose a Color | 1-24 | 25-Up | Each | Each | Insulation | Each | Insulation | Each | |||||||||||||||||||||||||||||||||||||||||||||||||||||||||||||||||||||||||||||||||||||
300V AC/300V DC—15 amp per Circuit | |||||||||||||||||||||||||||||||||||||||||||||||||||||||||||||||||||||||||||||||||||||||||||||||||||
| 3 | 2 | 28 to 12 | 5 | 103 | 3 | Blue, Gray | 9473T162 | 000000 | 000000 | 9473T165 | 00000 | 9473T144 | 00000 | Insulated | 9473T112 | 00000 | Insulated | 9473T113 | 00000 | ||||||||||||||||||||||||||||||||||||||||||||||||||||||||||||||||||||||||||||||||
Blank | Numbered for Horizontal Rails | Numbered for Vertical Rails |
Each | |||||||||||||||||||||||||||||||||||||||||||||||||||||||||||||||||||||||||||||||||||||||||||||||||||
|---|---|---|---|---|---|---|---|---|---|---|---|---|---|---|---|---|---|---|---|---|---|---|---|---|---|---|---|---|---|---|---|---|---|---|---|---|---|---|---|---|---|---|---|---|---|---|---|---|---|---|---|---|---|---|---|---|---|---|---|---|---|---|---|---|---|---|---|---|---|---|---|---|---|---|---|---|---|---|---|---|---|---|---|---|---|---|---|---|---|---|---|---|---|---|---|---|---|---|---|
For Terminal Block Wd., mm | Number Range | Includes | Markers per Card | Color | 1-24 | 25-Up | |||||||||||||||||||||||||||||||||||||||||||||||||||||||||||||||||||||||||||||||||||||||||||||
Blank | |||||||||||||||||||||||||||||||||||||||||||||||||||||||||||||||||||||||||||||||||||||||||||||||||||
| 5, 6, 8, 10, 12, 16, 25 | — | — | 100 | White | 9473T145 | 00000 | 00000 | ||||||||||||||||||||||||||||||||||||||||||||||||||||||||||||||||||||||||||||||||||||||||||||
Numbered for Horizontal Rails | |||||||||||||||||||||||||||||||||||||||||||||||||||||||||||||||||||||||||||||||||||||||||||||||||||
| 5, 6, 8, 10, 12, 16, 25 | 1 to 50 | Two of Each Number | 100 | White | 9473T146 | 00000 | 0000 | ||||||||||||||||||||||||||||||||||||||||||||||||||||||||||||||||||||||||||||||||||||||||||||
Numbered for Vertical Rails | |||||||||||||||||||||||||||||||||||||||||||||||||||||||||||||||||||||||||||||||||||||||||||||||||||
| 5, 6, 8, 10, 12, 16, 25 | 1 to 50 | Two of Each Number | 100 | White | 9473T147 | 00000 | 00000 | ||||||||||||||||||||||||||||||||||||||||||||||||||||||||||||||||||||||||||||||||||||||||||||
Through-Panel Terminal Blocks
 |
Mount these terminal blocks in a panel cutout to connect components on opposite sides. The screw-clamp terminals flatten your wire so it stays put when vibrated or pulled. For an even stronger and more conductive connection, crimp a terminal or wire ferrule onto the end of the wire.
For Panel Cutout | Mounting Holes | ||||||||||||||||||||||||||||||||||||||||||||||||||||||||||||||||||||||||||||||||||||||||||||||||||
|---|---|---|---|---|---|---|---|---|---|---|---|---|---|---|---|---|---|---|---|---|---|---|---|---|---|---|---|---|---|---|---|---|---|---|---|---|---|---|---|---|---|---|---|---|---|---|---|---|---|---|---|---|---|---|---|---|---|---|---|---|---|---|---|---|---|---|---|---|---|---|---|---|---|---|---|---|---|---|---|---|---|---|---|---|---|---|---|---|---|---|---|---|---|---|---|---|---|---|---|
No. of Circuits | For Wire Ga. | Wire Connection | Terminal Size | Terminal Ctr.-to-Ctr. | Lg. | Wd. | Ht. | Lg. | Ht. | Max. Temp., ° F | Color | Dia. | No. of | Each | |||||||||||||||||||||||||||||||||||||||||||||||||||||||||||||||||||||||||||||||||||||
600V AC/600V DC—60 amp per Circuit | |||||||||||||||||||||||||||||||||||||||||||||||||||||||||||||||||||||||||||||||||||||||||||||||||||
| 3 | 10 to 3 | Screw-Clamp Terminal | M5 | 5/8" | 3" | 1 13/16" | 1 3/16" | 2" | 1" | 194 | Black | 0.21" | 2 | 8056T13 | 000000 | ||||||||||||||||||||||||||||||||||||||||||||||||||||||||||||||||||||||||||||||||||||
Space-Saving Circuit Board Terminal Blocks
 |
Streamline wiring on small or crowded circuit boards. These terminal blocks connect the same number of circuits as larger blocks in about half the space. Pins on the bottom are spaced to match the layout of circuit boards. Solder them onto your board for a secure hold.
The screw-clamp terminals flatten your wire so it stays put when vibrated or pulled. For an even stronger and more conductive connection, crimp a terminal or wire ferrule onto the end of the wire.
Pin | |||||||||||||||||||||||||||||||||||||||||||||||||||||||||||||||||||||||||||||||||||||||||||||||||||
|---|---|---|---|---|---|---|---|---|---|---|---|---|---|---|---|---|---|---|---|---|---|---|---|---|---|---|---|---|---|---|---|---|---|---|---|---|---|---|---|---|---|---|---|---|---|---|---|---|---|---|---|---|---|---|---|---|---|---|---|---|---|---|---|---|---|---|---|---|---|---|---|---|---|---|---|---|---|---|---|---|---|---|---|---|---|---|---|---|---|---|---|---|---|---|---|---|---|---|---|
No. of Circuits | For Wire Ga. | Wire Connection | Terminal Size | Terminal Ctr.-to-Ctr. | Lg. | Wd. | Ht. | Lg. | Material | Max. Temp., ° F | Color | Pkg. Qty. | Pkg. | ||||||||||||||||||||||||||||||||||||||||||||||||||||||||||||||||||||||||||||||||||||||
300V AC—15 amp per Circuit | |||||||||||||||||||||||||||||||||||||||||||||||||||||||||||||||||||||||||||||||||||||||||||||||||||
| 3 | 22 to 12 | Screw-Clamp Terminal | M3 | 3/16" | 5/8" | 3/8" | 9/16" | 0.12" | Tin-Plated Nickel | 220 | Black | 10 | 5747N12 | 000000 | |||||||||||||||||||||||||||||||||||||||||||||||||||||||||||||||||||||||||||||||||||||
Terminal Blocks for RTD and Thermocouple Connection Heads
 |  |
Oblong | Round |
These terminal blocks fit inside connection heads for thermocouples and RTD. Make sure the block has enough circuits for your probe, and use a wire that matches your probe type. You can insert stripped wire directly or attach a terminal to prevent damage from the fastener.
Mounting Slots | |||||||||||||||||||||||||||||||||||||||||||||||||||||||||||||||||||||||||||||||||||||||||||||||||||
|---|---|---|---|---|---|---|---|---|---|---|---|---|---|---|---|---|---|---|---|---|---|---|---|---|---|---|---|---|---|---|---|---|---|---|---|---|---|---|---|---|---|---|---|---|---|---|---|---|---|---|---|---|---|---|---|---|---|---|---|---|---|---|---|---|---|---|---|---|---|---|---|---|---|---|---|---|---|---|---|---|---|---|---|---|---|---|---|---|---|---|---|---|---|---|---|---|---|---|---|
No. of Circuits | For Max. Wire Ga. | Wire Connection | Dia. | Ht. | Wd. | Dp. | For Thermocouple Wire Type | For RTD Probe Resistance, ohm | Max. Temp., ° F | Material | Ht. | Wd. | No. of | Each | |||||||||||||||||||||||||||||||||||||||||||||||||||||||||||||||||||||||||||||||||||||
Oblong | |||||||||||||||||||||||||||||||||||||||||||||||||||||||||||||||||||||||||||||||||||||||||||||||||||
| 3 | 14 | Screw Terminal | — | 1 3/8" | 2" | 1" | J, JX, K, KK, KX, T, TX | 100; 1,000 | 1,000 | Ceramic | 3/16" | 9/16" | 2 | 38705K83 | 000000 | ||||||||||||||||||||||||||||||||||||||||||||||||||||||||||||||||||||||||||||||||||||
Round | |||||||||||||||||||||||||||||||||||||||||||||||||||||||||||||||||||||||||||||||||||||||||||||||||||
| 3 | 14 | Screw Terminal | 1 15/16" | — | — | 3/4" | J, JX, K, KK, KX, T, TX | 100; 1,000 | 1,000 | Ceramic | 3/16" | 5/16" | 2 | 5927N14 | 00000 | ||||||||||||||||||||||||||||||||||||||||||||||||||||||||||||||||||||||||||||||||||||
