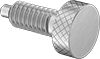
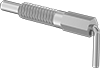
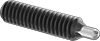
We will reply to your message within an hour.
Retract the nose by pulling the knob.
Lock the nose into the retracted position by pulling the knob and rotating it 90°.
Quickly align, join, or hold machine components in place in food, pharmaceutical, and other sanitary environments. Pulling the plunger knob and twisting it 90° will lock the nose into its retracted position.
The ring allows you to attach these spring plungers to a lanyard.
Lock the nose into the retracted position by pulling the ring and rotating it 90°.
Use the lanyard as a tether to secure the spring plunger to machinery and prevent accidental drops.
Lock the nose into the retracted position by pulling the handle and rotating it 90°.
Thread onto machinery or attach a knob or handle to the threaded spindle.
Install by hand or with a hex key in low-clearance applications.
A quarter turn of the handle locks these plungers in the retracted position. The T-handle is easy to grip.
A T-handle makes these spring plungers easy to grip.
An L-handle takes up less space than a T-handle.
A smooth ball handle is easy to grip and won't catch on other parts.
A quarter turn of the handle locks these plungers in the retracted position. The smooth ball handle is easy to grip and won't catch on other parts.
Add a knob or handle to the threaded shank.
Two holes in the plate allow these plungers to be mounted to a flat surface.
Lock the nose in the retracted position by pulling the knob and rotating it 90°.
Use an arbor press or similar pressure tool to install these spring plungers into a panel.
Insert the nose into a panel; then thread on the nut and tighten using an installation wrench.
Install with a hex key for more torque than slotted long-nose spring plungers.
Fasten from the nose end with a wrench for more torque than slotted long-nose spring plungers.
These spring plungers have a nose that is about three-times longer than standard long hex-nose spring plungers.
Install with a driver.
Noses are up to four times longer than standard long-nose press-fit spring plungers.
A flange keeps the plunger from being pushed through a hole when the ball is depressed.
Slotted on both ends for installation with a screwdriver.
Install these spring plungers with a screwdriver—they're slotted on one or both ends.
Install with a hex key for more torque than slotted ball-nose spring plungers.
Designed with a flange to keep the plunger from being pushed through a hole when the ball is depressed.
An O-ring in the flange creates a tight seal.
The flangeless design allows these spring plungers to mount flush with a surface.
Mount ball-nose and long-nose spring plungers to fixture surfaces.
Weld these catches in place for a strong permanent hold.
Press these catches into a hole.
Install spring plungers from the nose end without depressing the nose.
Bolts are spring-loaded to stay latched until you activate the pull.
Pull the chain-grip to unlatch hard-to-reach doors and panels.
The spring-loaded bolt stays latched until you pull it back—slide the bolt and drop the knob into the notch to secure.
These padlockable latches are often used on 2" and 3" track to keep garage and other sectional overhead doors closed.
A black-oxide finish provides mild corrosion resistance.
These stainless steel anchor studs offer excellent corrosion resistance.