Manufacturer Manufacturer | Show |
|---|
|
Jaw Material Jaw Material |
|---|
|
Power Source Power Source |
|---|
|
Body Material Body Material |
|---|
|
Jaw Adjustment Type Jaw Adjustment Type |
|---|
|
For Caliper Measuring Range For Caliper Measuring Range |
|---|
|
Batteries Included Batteries Included |
|---|
|
Battery Chemistry Battery Chemistry |
|---|
|
Manufacturer Model Number Manufacturer Model Number |
|---|
DFARS (Defense Acquisition Regulations Supplement) DFARS (Defense AcquisitionRegulations Supplement) |
|---|
Material Material |
|---|
|
REACH (Registration, Evaluation, Authorization and Restriction of Chemicals) REACH (Registration,Evaluation, Authorization and Restriction of Chemicals) |
|---|
|
RoHS (Restriction of Hazardous Substances) RoHS (Restriction ofHazardous Substances) |
|---|
|
Starrett Electronic Calipers
All calipers have zero-position memory, also known as absolute (ABS) positioning, which retains the measuring position when the caliper is turned off. A zero-set button allows you to start measuring at any point.
Depth base attachment (sold separately) stabilizes your caliper when taking depth measurements.
Measuring Range | Accuracy | Measuring Increments | |||||||||||
|---|---|---|---|---|---|---|---|---|---|---|---|---|---|
| Inch | Metric | Inch | Metric | Inch | Metric | Overall Lg. | Body Material | Jaw Material | Jaw Dp. | Batteries Included | Manufacturer Model Number | Each | |
| 0"-6" | 0 mm-150 mm | ±0.001" | ±0.025 mm | 0.0005" | 0.01 mm | 9 1/4" | Stainless Steel | Stainless Steel | 1 1/2" | Yes | EC799A-6/150 | 00000000 | 0000000 |
| 0"-8" | 0 mm-200 mm | ±0.0015" | ±0.040 mm | 0.0005" | 0.01 mm | 11 1/2" | Stainless Steel | Stainless Steel | 2" | Yes | EC799A-8/200 | 00000000 | 000000 |
| 0"-12" | 0 mm-300 mm | ±0.0015" | ±0.040 mm | 0.0005" | 0.01 mm | 15 1/4" | Stainless Steel | Stainless Steel | 2 1/2" | Yes | EC799A-12/300 | 00000000 | 000000 |
| For Caliper Measuring Range | Pkg. Qty. | Each | ||
| Depth Base Attachment | 0"-6", 0"-8", 0 mm-150 mm, 0 mm-200 mm | __ | 00000000 | 000000 |
| Replacement Case | 0"-6", 0 mm-150 mm | __ | 0000000 | 00000 |
| Replacement Case | 0"-8", 0 mm-200 mm | __ | 0000000 | 00000 |
| Replacement Battery Cover | 0"-6", 0"-8", 0 mm-150 mm, 0 mm-200 mm | __ | 0000000 | 00000 |
| Pkg. | ||||
|---|---|---|---|---|
| Replacement Battery | __ | 1 | 0000000 | 0000 |
Starrett Electronic Calipers with Calibration Certificate
These calipers come with a calibration certificate traceable to NIST that states they've passed a test for accuracy. Zero-position memory, also known as absolute (ABS) positioning, retains the measuring position when the caliper is turned off. A zero-set button allows you to start measuring at any point.
Depth base attachment (sold separately) stabilizes your caliper when taking depth measurements.
Measuring Range | Accuracy | Measuring Increments | |||||||||||
|---|---|---|---|---|---|---|---|---|---|---|---|---|---|
| Inch | Metric | Inch | Metric | Inch | Metric | Overall Lg. | Body Material | Jaw Material | Jaw Dp. | Batteries Included | Manufacturer Model Number | Each | |
| 0"-6" | 0 mm-150 mm | ±0.001" | ±0.025 mm | 0.0005" | 0.01 mm | 9 1/4" | Stainless Steel | Stainless Steel | 1 1/2" | Yes | EC799A-6/150 | 00000000 | 0000000 |
| 0"-8" | 0 mm-200 mm | ±0.0015" | ±0.040 mm | 0.0005" | 0.01 mm | 11 1/2" | Stainless Steel | Stainless Steel | 2" | Yes | EC799A-8/200 | 00000000 | 000000 |
| 0"-12" | 0 mm-300 mm | ±0.0015" | ±0.040 mm | 0.0005" | 0.01 mm | 15 1/4" | Stainless Steel | Stainless Steel | 2 1/2" | Yes | EC799A-12/300 | 00000000 | 000000 |
| 0"-24" | 0 mm-600 mm | ±0.002" | ±0.050 mm | 0.0005" | 0.01 mm | 31 1/2" | Stainless Steel | Stainless Steel | 4" | Yes | 799AZ-24/600 | 000000000 | 00000000 |
| For Caliper Measuring Range | Pkg. Qty. | Each | ||
| Depth Base Attachment | 0"-6", 0"-8", 0 mm-150 mm, 0 mm-200 mm | __ | 00000000 | 000000 |
| Replacement Case | 0"-6", 0 mm-150 mm | __ | 0000000 | 00000 |
| Replacement Case | 0"-8", 0 mm-200 mm | __ | 0000000 | 00000 |
| Replacement Battery Cover | 0"-6", 0"-8", 0 mm-150 mm, 0 mm-200 mm | __ | 0000000 | 00000 |
| Pkg. | ||||
|---|---|---|---|---|
| Replacement Battery | __ | 1 | 0000000 | 0000 |
Harsh Environment Starrett Electronic Calipers
IP67 rated for protection from dust and temporary water submersion. Zero-position memory, also known as absolute (ABS) positioning, retains the measuring position when the caliper is turned off. A zero-set button lets you start measuring at any point.
USB data cable (sold separately) connects calipers with SPC data output directly to your PC.
10-pin data cable (sold separately) connects calipers with SPC data output to a data processor or multiplexer.
Wireless data transmitter and receiver (sold separately) allow you to transmit measurement data from calipers with SPC data output to your PC without being tethered by a cable.
Depth base attachment (sold separately) stabilizes your caliper when taking depth measurements.
Measuring Range | Accuracy | Measuring Increments | |||||||||||
|---|---|---|---|---|---|---|---|---|---|---|---|---|---|
| Inch | Metric | Inch | Metric | Inch | Metric | Overall Lg. | Body Material | Jaw Material | Jaw Dp. | Batteries Included | Manufacturer Model Number | Each | |
Without SPC Data Output | |||||||||||||
| 0"-6" | 0 mm-150 mm | ±0.001" | ±0.025 mm | 0.0005" | 0.01 mm | 9 1/4" | Stainless Steel | Stainless Steel | 1 1/2" | Yes | 798A-6/150 | 0000000 | 0000000 |
| 0"-8" | 0 mm-200 mm | ±0.0015" | ±0.040 mm | 0.0005" | 0.01 mm | 11 1/2" | Stainless Steel | Stainless Steel | 1 7/8" | Yes | 798A-8/200 | 0000000 | 000000 |
| 0"-12" | 0 mm-300 mm | ±0.0015" | ±0.040 mm | 0.0005" | 0.01 mm | 15 1/4" | Stainless Steel | Stainless Steel | 2 1/2" | Yes | 798A-12/300 | 0000000 | 000000 |
With SPC Data Output | |||||||||||||
| 0"-6" | 0 mm-150 mm | ±0.001" | ±0.025 mm | 0.0005" | 0.01 mm | 9 1/4" | Stainless Steel | Stainless Steel | 1 1/2" | Yes | 798B-6/150 | 0000000 | 000000 |
| 0"-8" | 0 mm-200 mm | ±0.0015" | ±0.040 mm | 0.0005" | 0.01 mm | 11 1/2" | Stainless Steel | Stainless Steel | 1 7/8" | Yes | 798B-8/200 | 0000000 | 000000 |
| 0"-12" | 0 mm-300 mm | ±0.0015" | ±0.040 mm | 0.0005" | 0.01 mm | 15 1/4" | Stainless Steel | Stainless Steel | 2 1/2" | Yes | 798B-12/300 | 0000000 | 000000 |
| For Caliper Measuring Range | Pkg. Qty. | Each | ||
| USB Data Cable | __ | __ | 0000000 | 0000000 |
| 10-Pin Data Cable | __ | __ | 0000000 | 000000 |
| Wireless Data Transmitter | __ | __ | 0000000 | 000000 |
| Wireless Data Receiver | __ | __ | 0000000 | 00000000 |
| Depth Base Attachment | 0"-6", 0"-8", 0 mm-150 mm, 0 mm-200 mm | __ | 00000000 | 00000 |
| Replacement Case | 0"-6", 0 mm-150 mm | __ | 0000000 | 00000 |
| Replacement Case | 0"-8", 0 mm-200 mm | __ | 0000000 | 00000 |
| Pkg. | ||||
|---|---|---|---|---|
| Replacement Battery | __ | 1 | 0000000 | 0000 |
Harsh Environment Starrett Electronic Calipers with Calibration Certificate
These calipers come with a calibration certificate traceable to NIST that states they've passed a test for accuracy. They’re IP67 rated for protection from dust and temporary water submersion.
Zero-position memory, also known as absolute (ABS) positioning, retains the measuring position when the caliper is turned off. A zero-set button lets you start measuring at any point.
USB data cable (sold separately) connects calipers with SPC data output directly to your PC.
10-pin data cable (sold separately) connects calipers with SPC data output to a data processor or multiplexer.
Wireless data transmitter and receiver (sold separately) allow you to transmit measurement data from calipers with SPC data output to your PC without being tethered by a cable.
Depth base attachment (sold separately) stabilizes your caliper when taking depth measurements.
Measuring Range | Accuracy | Measuring Increments | |||||||||||
|---|---|---|---|---|---|---|---|---|---|---|---|---|---|
| Inch | Metric | Inch | Metric | Inch | Metric | Overall Lg. | Body Material | Jaw Material | Jaw Dp. | Batteries Included | Manufacturer Model Number | Each | |
Without SPC Data Output | |||||||||||||
| 0"-6" | 0 mm-150 mm | ±0.001" | ±0.025 mm | 0.0005" | 0.01 mm | 9 1/4" | Stainless Steel | Stainless Steel | 1 1/2" | Yes | 798A-6/150 | 0000000 | 0000000 |
| 0"-8" | 0 mm-200 mm | ±0.0015" | ±0.040 mm | 0.0005" | 0.01 mm | 11 1/2" | Stainless Steel | Stainless Steel | 1 7/8" | Yes | 798A-8/200 | 0000000 | 000000 |
| 0"-12" | 0 mm-300 mm | ±0.0015" | ±0.040 mm | 0.0005" | 0.01 mm | 15 1/4" | Stainless Steel | Stainless Steel | 2 1/2" | Yes | 798A-12/300 | 0000000 | 000000 |
With SPC Data Output | |||||||||||||
| 0"-6" | 0 mm-150 mm | ±0.001" | ±0.025 mm | 0.0005" | 0.01 mm | 9 1/4" | Stainless Steel | Stainless Steel | 1 1/2" | Yes | 798B-6/150 | 0000000 | 000000 |
| 0"-8" | 0 mm-200 mm | ±0.0015" | ±0.040 mm | 0.0005" | 0.01 mm | 11 1/2" | Stainless Steel | Stainless Steel | 1 7/8" | Yes | 798B-8/200 | 0000000 | 000000 |
| 0"-12" | 0 mm-300 mm | ±0.0015" | ±0.040 mm | 0.0005" | 0.01 mm | 15 1/4" | Stainless Steel | Stainless Steel | 2 1/2" | Yes | 798B-12/300 | 0000000 | 000000 |
| For Caliper Measuring Range | Pkg. Qty. | Each | ||
| USB Data Cable | __ | __ | 0000000 | 0000000 |
| 10-Pin Data Cable | __ | __ | 0000000 | 000000 |
| Wireless Data Transmitter | __ | __ | 0000000 | 000000 |
| Wireless Data Receiver | __ | __ | 0000000 | 00000000 |
| Depth Base Attachment | 0"-6", 0"-8", 0 mm-150 mm, 0 mm-200 mm | __ | 00000000 | 00000 |
| Replacement Case | 0"-6", 0 mm-150 mm | __ | 0000000 | 00000 |
| Replacement Case | 0"-8", 0 mm-200 mm | __ | 0000000 | 00000 |
| Pkg. | ||||
|---|---|---|---|---|
| Replacement Battery | __ | 1 | 0000000 | 0000 |
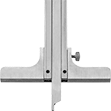
Depth Base Attachments for Starrett Calipers

Attach to Starrett electronic and dial calipers to stabilize them when taking depth measurements.
| Manufacturer Model Number | For Caliper Measuring Range | Lg. | Wd. | Ht. | Slot Wd. | Material | Includes | Each | |
| PT22431 | 0"-6", 0"-8", 0"-9", 0 mm-150 mm, 0 mm-200 mm, 0 mm-225 mm | 3" | 1/4" | 1" | 5/8" | Stainless Steel | Screw-Locking Clamp | 00000000 | 000000 |
Battery Covers for Starrett Calipers

| Manufacturer Model Number | For Manufacturer Series | For Manufacturer Model Number | For Caliper Measuring Range | Material | Each | |
| 63620-0 | EC799 | EC799A-6/150, EC799A-8/200 | 0"-6", 0"-8", 0 mm-150 mm, 0 mm-200 mm | Plastic | 0000000 | 000000 |
Cases for Starrett Calipers

| For Caliper Measuring Range | Material | Manufacturer Model Number | For Manufacturer Series | For Manufacturer Model Number | Each | |
| 0"-6", 0 mm-150 mm | Plastic | PT24890 | 120, 798, EC799 | 120A-6, 120AM-150, 120X-6, 798A-6/150, 798B-6/150, B120A-6, EC799A-6/150, R120A-6 | 0000000 | 000000 |
| 0"-8", 0 mm-200 mm | Wood | 950 | 798, EC799 | 798A-8/200, 798B-8/200, EC799A-8/200 | 0000000 | 00000 |
| 0"-12" | Wood | 946 | 120 | 120-12, 120Z-12 | 0000000 | 00000 |
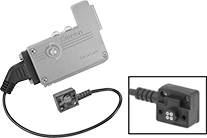
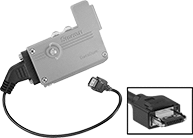
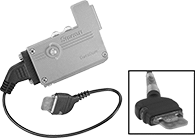
Starrett Wireless Transmitters
Wirelessly transmit data from measuring tools with SPC output to a PC. Select the transmitter with the connection that is compatible with your measuring tool’s SPC output port. A wireless receiver (sold separately) is required. Measurement data can be imported into Microsoft Excel or any SPC software.


| Starrett Measuring Tool Connection Type | Communication Range, ft. | Lg. | Wd. | Ht. | Power Source | Batteries Included | Manufacturer Series | Manufacturer Model No. | For Manufacturer Series | Each | |
| 4 Pin | 65 | 2" | 2" | 1/2" | Battery | Yes | 1500 | 1500-3A-21N | 2900 | 0000000 | 0000000 |
| Mini Connector | 65 | 2" | 2" | 1/2" | Battery | Yes | 1500 | 1500-3A-4N | 2700 | 0000000 | 000000 |
| Straight Starrett Connector | 65 | 2" | 2" | 1/2" | Battery | Yes | 1500 | 1500-3A-18N | 798 | 0000000 | 000000 |
| Replacement Button Cell Battery (Pkg. of 1) | 0000000 | Pkg. | 00000 |

USB Connection | |||||||||||
|---|---|---|---|---|---|---|---|---|---|---|---|
| Computer Connection Type | Standard | Type | Communication Range, ft. | Lg. | Wd. | Ht. | Includes | For Manufacturer Series | Manufacturer Model No. | Each | |
| USB | 2.0 | A | 100 | 7" | 5 1/2" | 2 1/2" | USB Cable | 1500 | 1500-1-N | 0000000 | 000000000 |
Starrett Wireless Receivers
Connect this receiver to your PC for use with a Starrett wireless transmitter (sold separately).

USB Connection | |||||||||||
|---|---|---|---|---|---|---|---|---|---|---|---|
| Computer Connection Type | Standard | Type | Communication Range, ft. | Lg. | Wd. | Ht. | Includes | Manufacturer Model No. | For Manufacturer Series | Each | |
| USB | 2.0 | A | 100 | 7" | 5 1/2" | 2 1/2" | USB Cable | 1500-1-N | 1500 | 0000000 | 000000000 |
| Starrett Measuring Tool Connection Type | Communication Range, ft. | Lg. | Wd. | Ht. | Power Source | Batteries Included | Manufacturer Series | Manufacturer Model No. | For Manufacturer Series | Each | |
| 4 Pin | 65 | 2" | 2" | 1/2" | Battery | Yes | 1500 | 1500-3A-21N | 2900 | 0000000 | 0000000 |
| Mini Connector | 65 | 2" | 2" | 1/2" | Battery | Yes | 1500 | 1500-3A-4N | 2700 | 0000000 | 000000 |
| Straight Starrett Connector | 65 | 2" | 2" | 1/2" | Battery | Yes | 1500 | 1500-3A-18N | 798 | 0000000 | 000000 |
Starrett USB Cables


Use these cables to connect measuring tools with SPC data output directly to a PC. Select the cable with the connection that is compatible with your measuring tool’s SPC output port. Measurement data can be imported into Microsoft Excel or any SPC software.
Starrett 10-Pin Cables


Connect measuring tools with SPC data output to miniprocessors and multiplexers. Select the cable with the connection that is compatible with your measuring tool’s SPC output port.
| Starrett Measuring Tool Connection Type | Data Processor Connection Type | Lg., ft. | Manufacturer Model No. | For Manufacturer Series | Each | |
| 4 Pin | 10-Pin Starrett Connector | 5 1/2 | 2900SCM | 2900 | 0000000 | 0000000 |
| Mini Connector | 10-Pin Starrett Connector | 5 1/2 | 2700SCM | 2700 | 0000000 | 000000 |
| Straight Starrett Connector | 10-Pin Starrett Connector | 5 1/2 | 798SCM | 798 | 0000000 | 000000 |
Starrett Electronic Precision Measuring Tool Sets

Set includes a caliper, a micrometer, and a case. The micrometer has a friction thimble with a constant-force mechanism, so that once the spindle contacts the surface of the measured object, it will stop tightening. This ensures repeatable measurements and prevents over-tightening. Once the spindle stops tightening, the thimble will continue turning with resistance.
Zero-position memory, also known as absolute (ABS) positioning, retains the measuring position when the caliper or micrometer is turned off. A zero-set button allows you to start measuring at any point.
Measuring Range | |||||||
|---|---|---|---|---|---|---|---|
| Inch | Metric | Micrometer Thimble Type | Batteries Included | Includes | Manufacturer Model Number | Each | |
| 0"-6" | 0 mm-150 mm | Friction | Yes | One Caliper (0"-6"/0 mm-150 mm Measuring Range, 0.0005"/0.01 mm Measuring Increments, ±0.001"/±0.02 mm Accuracy), One Micrometer (0"-1"/0 mm-25 mm Measuring Range, 0.0001"/0.001 mm Measuring Increments, ±0.0001"/±0.002 mm Accuracy) | S766AZ | 00000000 | 0000000 |
| Replacement Battery (1/Pkg.) | 0000000 | Pkg. | 00000 |
Starrett Electronic Precision Measuring Tool Sets with Calibration Certificate

This set comes with calibration certificates traceable to NIST that state each tool has passed a test for accuracy. It includes a caliper, a micrometer, and a case. The micrometer has a friction thimble with a constant-force mechanism, so that once the spindle contacts the surface of the measured object, it will stop tightening. This ensures repeatable measurements and prevents over-tightening. Once the spindle stops tightening, the thimble will continue turning with resistance.
Zero-position memory, also known as absolute (ABS) positioning, retains the measuring position when the caliper or micrometer is turned off. A zero-set button allows you to start measuring at any point.
Measuring Range | |||||||
|---|---|---|---|---|---|---|---|
| Inch | Metric | Micrometer Thimble Type | Batteries Included | Includes | Manufacturer Model Number | Each | |
| 0"-6" | 0 mm-150 mm | Friction | Yes | One Caliper (0"-6"/0 mm-150 mm Measuring Range, 0.0005"/0.01 mm Measuring Increments, ±0.001"/±0.02 mm Accuracy), One Micrometer (0"-1"/0 mm-25 mm Measuring Range, 0.0001"/0.001 mm Measuring Increments, ±0.0001"/±0.002 mm Accuracy) | S766AZ | 00000000 | 0000000 |
| Replacement Battery (1/Pkg.) | 0000000 | Pkg. | 00000 |


