


Filter by
Component
U.S.–Mexico–Canada Agreement (USMCA) Qualifying
Export Control Classification Number (ECCN)
DFARS Specialty Metals
Door Guides
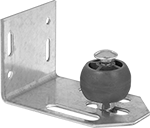 | 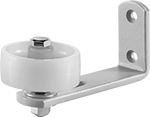 | 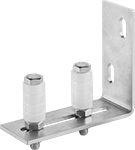 |  |
Style 1 | Style 2 | Style 3 | Style 4 |
 |  |  | |
Style 5 | Style 6 | Style 7 |
Guides
| | | |
Style 1 | Style 2 | Style 3 | Style 4 |
| | | |
Style 5 | Style 6 | Style 7 |
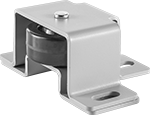
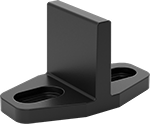
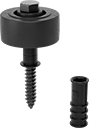
Style | For Max. Door Thk. | Lg. | Wd. | Ht. | Dia. | Thread Lg. | Material | Color | Roller Material | Mounting Fasteners Included | Mounting Screw Size | Each | |||
|---|---|---|---|---|---|---|---|---|---|---|---|---|---|---|---|
Wall Mount | |||||||||||||||
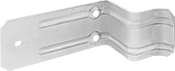
| 1 | 3 1/2" | 5 3/8" | 3 1/2" | 3 1/2" | — | — | Steel | — | Plastic | No | No. 14 | 1217A4 | 000000 | ||
| 2 | 2 3/4" | 5 1/8" | 2 1/2" | 2 1/2" | — | — | Steel | — | Plastic | No | No. 12 | 1217A1 | 00000 | ||
| 2 | 2 3/4" | 5 1/8" | 2 1/2" | 2 1/2" | — | — | 304 Stainless Steel | — | Plastic | No | No. 12 | 1111A7 | 00000 | ||
| 3 | 3" | 5 3/8" | 2" | 4 1/2" | — | — | 316 Stainless Steel | — | — | No | No. 10 | 10135A65 | 000000 | ||
Floor Mount | |||||||||||||||
| 4 | Any | 6" | 2 9/16" | 2 3/4" | — | — | Steel | — | Plastic | No | No. 16 | 1217A2 | 00000 | ||
| 5 | Any | 7 1/8" | 5 7/16" | 2 15/16" | — | — | Steel | — | Plastic | No | No. 16 | 1217A3 | 000000 | ||
| 6 | Any | 1 3/4" | 15/16" | 1" | — | — | Nylon | Black | — | Yes | No. 8 | 7791N11 | 00000 | ||
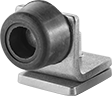
| 7 | Any | — | — | 2 3/4" | 2 1/2" | 2 1/8" | Steel | — | Rubber | Yes | 1/2" | 7791N13 | 00000 | ||
Door-Bottom Channels
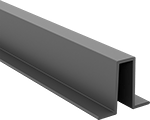 |
For Style | Lg. | Wd. | Ht. | Channel Wd. | Material | Color | Each | ||
|---|---|---|---|---|---|---|---|---|---|
| 6 | 60" | 1 1/16" | 7/8" | 3/8" | Plastic | Brown | 7791N12 | 000000 |
Door Stops for Sliding Doors
 |  | |
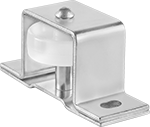
Style 1 | Style 2 | Style 3 |
Keep sliding doors and panels from damaging walls and door frames. Mount these stops with screws.
Style 1—Style 1 mount on doors and panels up to 2 1/4" thick.
Styles 2 and 3—Styles 2 and 3 mount on the floor.
304 Stainless Steel—Stainless steel stops have excellent corrosion resistance, making them the best choice for harsh environments. They also have good chemical resistance. They include a rubber bumper, which is abrasion resistant.
